Wednesday 30 November 2011

Amaretti Kisses with Hot Chocolate Cherry Sauce

Okay I will be honest the kisses whilst delicious, didn't quite look as presentable as I’d planned in my head or notebook. Yes I do agree they look *slightly* like chicken goujons. Though fortunately do not taste anything like them! However the sauce is ohmigod unbelievably simple but omigod soo soo good! It will change your life.

The Hot Chocolate Cherry sauce is most definitely the best dessert sauce I have ever made. A thing of greatness. Post filming of this recipe saw both me and my brother, and also excellent cameraman very un-elegantly devour the remaining sauce, along with making a second batch of the kisses mixture for dipping into. This is also why I didn't manage to take a picture of the finished dish as greed took over!


Its got a real ‘naughty treat’ feeling! Its also ready in less than ten minutes, which is either very dangerous or very good? I can imagine it being rather lush served over vanilla icecream. Or just secretly with a spoon when you are alone.

As most of you will know I am a complete chocoholic and whilst I can be fussy when it comes to choosing, I am not fussy on price and will pay for what I like. For this recipe its best not to crack out your finest stuff bought for best – I used Sainsburys basics dark chocolate, which was surprisingly edible and for a meagre 30p per bar was absolutely perfect for the sauce. 

This recipe is also the final in my video’s for Russell Hobbs, you can vote for this recipe on this link! Many thanks to all who voted so far and I hope they didn’t put you off visiting my blog! You can check out my other three here and there is still time to vote if you like them - all you have to do is click on the 'like' bit underneath the video:


I would like to give a special thanks to the lovely Agata at Manning Gottlieb OMD who has been a great help at times during the last four challenging weeks! Also a big thanks to Russell Hobbs for inviting me to take part and getting to play with lots of your lovely shiny kitchen stuff!

This weeks theme was 'freestyle' and I chose to play with the 3-in-1 Hand blender. Its a great piece of multi-tasking kit, and my favourite out of all the Allure range. As well as making this recipe, I've also used it for lots of other kitchen jobs and have been very pleased with its performace. If you have a small kitchen and are considering a multi-tasking tool then I would highly recommend this, as it will cover most of your mixing, chopping and blending jobs, with ease. 

Recipe:

Serves 2
Easy
Under 10 minutes 

Sauce:
½ Tin pitted black cherries in juice
25g Dark chocolate, broken up
1 tbsp Disaronno liqueur (amaretto)

Amaretti Kisses:
100g Ricotta
50g Double cream
20g Icing sugar
8 Amaretti biscuits (Doria brand are ideal)

Firstly, drain the cherries reserving the juice. Place 75g of cherries in a bowl, and 100ml of the juice in a small pan, place on a medium heat

Meanwhile blitz the amaretti in the Allure chopper attachment to thick crumbs and lay on a plate. Add the drained cherries to the chopper attachment and blitz to a thick mixture, stir into the bubbling cherry juice.

Put the double cream in the Allure beaker, whisk briefly using the whisk attachment until just thickened, add the ricotta and icing sugar, and whisk briefly until creamy and thick, being careful not to get into butter territory! Use two dessert spoons to very carefully shape into quenelles, roll carefully in the crumbs and place on your serving dish

Stir the disaronno into the bubbling cherry mixture and cook for a further two minutes. Remove from the heat and stir in the chocolate. Allow to melt then serve in little bowls, alongside the Amaretti kisses.

Enjoy!

You can see my video also via Youtube:


Sorry again about awful picture - as mentioned above, greed took its hold and so this is taken from the video!


Monday 28 November 2011

Christmas Swirls

Is it too early to mention the C word yet? No? Okay phew! Aveen - I know you have been waiting patiently for these!

This year I am trying to be organised and have already started squirrelling things away in the freezer for Christmas meals. As someone who does shift work, and will be working throughout the festive season getting ahead now will hopefully mean calm in the future, and more importantly less washing up on the big day itself! As well as a batch of these lovely little swirls, ready for Christmas snacking, I’ve already made up a batch of carrot and swede mash, and two batches of pork, cranberry and apple stuffing mixes!

The inspiration for these lovely, festive little swirls came from having a spare block of puff pastry that needed using up, and a recipe from the latest Tesco instore magazine (please tell me I am not the only magpie who picks up every freebie recipe card/ magazine/ newspaper?) Plus I’ve also always wanted to make Danish pastries and finally seized my chance on a treasured day off this week!

I adapted the original recipe to what I had in the various boxes I moved house with and adjusted quantities as to what felt right! These little puffs are rather good and are great with a nice cup of coffee or tea! They are easy and fun to make and will be very popular, judging by how quickly mine vanished!

Makes 30 swirls - Keep half, freeze half. Or all. Depends if you can wait till Christmas!

Ingredients

500g block puff pastry
plain flour and icing sugar for dusting
200g good quality mincemeat – I used Sainsburys Taste the Difference
2 tsp runny honey
1 tsp orange extract (I love Sainsburys TTD Valencian orange extract)
50g + 10g flaked almonds, roughly crushed in your hand
40g + 20g dried and sweetened sour cherries, roughly chopped
Small chunk of Angelica, sliced into little bits

Method:

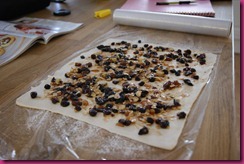
In a bowl mix together the mincemeat, orange extract, honey, 50g of the almonds and 40g of the cherries. Christmas Swirls 11
Cut the pastry block in half, roll one block out on a floured surface into a rectangle shape, about 1/4cm thick or so. I laid mine at this stage onto cling film – makes the next stages easier! Spread over half the mincemeat mixture in a thin layer, right to the edges.
Christmas Swirls 13
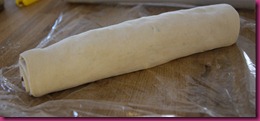
Now use the cling wrap to help roll it really tightly, like a swiss roll, wrap tightly in flim and freeze for 15 minutes
Christmas Swirls 14

For the second batch, assuming you are going to freeze them, repeat the above stage

Pre-heat oven to 200 fan

Line a baking tray(s) with baking/ parchment paper

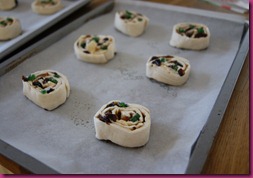
Carefully remove your rolls from the freezer. Using a sharp knife cut the first roll into 1cm strips and lay flat on the baking tray, leaving space for them to expand a little. Press over the little bits of angelicaChristmas Swirls 18

Bake for 15 minutes or until golden and your kitchen smells a little like heaven. Whilst still hot, sprinkle with remaining almonds and cherries and dust with icing sugar. Allow to cool on the paper, then transfer to a wire rack. They will be a little sticky underneath so just nudge now and again to loosen.

With the remaining roll, also cut into 1cm rounds but transfer onto baking / parchment paper, in small layers and transfer to a suitable container for freezing. Freeze until Santa is on his way.

*Note the 10/g20g almond/ cherry mix is only for 15 freshly baked swirls You will need more for when the frozen friends come out to play*
Christmas Swirls 4

I've sent my Christmas Swirls over to Sweets for a Saturday #45- a fabulous blog full of naughty but nice treats! 


Saturday 26 November 2011

Cooking with Knorr..

Over the next year I will be working with Knorr to bring you a selection of seasonal recipes. It’s an exciting project and I hope to bring you some fantastic ideas and recipes!

On a personal note, since the launch of the Knorr stock pots I’ve been using them frequently and find they give an excellent base to stews, sauces etc. I really like how quickly they dissolve, and another bonus is that I don’t have to crumble up a stock cube – a pet hate of mine! Most importantly they taste natural, not over salty and produce excellent results every time.

Over the last decade or so Britain has really caught up with our European counterparts in the food stakes, and I am very proud of the excellent quality of products that are now available. So when Knorr approached me and asked if I would like to cook with some produce from Forman and Fields, I naturally jumped at the opportunity! They are quintessentially British and source the highest quality products for your table.

Recently I took delivery of a rather fabulous seasonal hamper from Forman and Fields, and with the contents of it I have been playing with my food, something our mothers most likely criticised us for doing when we were young! I probably should have been busy revising but cooking is far more fun to do than Maths!

Within my hamper I was given everything to make the ultimate Christmas Dinner. However factor in shifts, attending college and in general being fairly occupied, I was not able to produce said dinner in one go and some bits have been squirreled away into the freezer (including a gigantic turkey that my poor brother had to cycle home with in his rucksack – I so would love a picture of this!). However, I have instead been busy making stuff with all the lovely ingredients! 

These are a little teaser of what will appear on the blog shortly!


Tuesday 22 November 2011

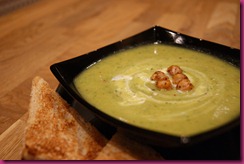
Spiced Cauliflower soup with Chickpea Raita Topping

This lovely, gloriously green soup is packed with fresh herbs and flavour, and its also my third Video recipe in the Russell Hobbs Blogger VS Fans challenge that’s currently in progress over on Facebook!


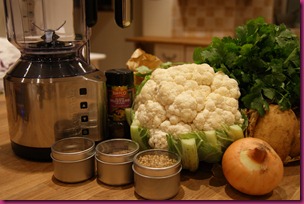
This week I got to play with their Allure Jug Blender and I must say I am seriously impressed with this new shiny toy! I’ve used a couple of different blenders over the past few years, ranging in quality but this is a mighty beast! The key features for me are the pull out cord (which admittedly my brother discovered after the first use!) and the speed settings which are easy to control; always important for someone who doesn’t like to read instruction manuals! Another bonus is its little rubber feet that stop it dancing on the counter! Its a big machine, but its still pretty and shiny!DSC00818

Whilst the soup has a range of herbs and spices in, its not actually hot as in spicy heat. Regrettably I can’t tolerate much chilli nowadays and this is pleasantly mild but flavourful. If you would prefer a little heat, add a green chilli or two to the mix. The blender does a great job at making it really smooth, so no nasty gravelly bits which I’ve had in the past with other liquidizers!

Serves 6, Easy, Ready in under 30 minutes

Ingredients:

1/2 a large or 1 regular sized cauliflower, cut into smallish chunks
1 white onion, finely chopped
1 medium sized potato, diced
1 bunch fresh coriander, roughly chopped
1 tsp cumin seeds
1tsp freshly ground coriander seeds
1 tsp turmeric
1 tsp black mustard seeds
40g cooked chickpeas
1500ml vegetable stock
Spray cooking oil or olive oil
S&P to taste

Topping:

40g cooked chickpeas
Pinch of garam masala

Raita:

120g plain natural yoghurt
1 small bunch fresh mint, roughly chopped

soup image

Start by sweating the onion in a large saucepan in spray oil, until soft but not too browned. Stir in the ground coriander, mustard seeds, turmeric and cumin, and potatoes, stir well, add the cauliflower, cover with the stock and bring to the boil, reduce the heat and gently simmer for 15 minutes, stir in the chickpeas for final minute to warm through.

Meanwhile stir the mint into the yoghurt. In a small pan, add a teeny bit of oil, toast the chickpeas for a couple of minutes with the garam masala. Reserve to one side

Blitz the soup in the blender, until all lovely and smooth. You will need to do this in two batches – have a clean saucepan ready for transferring the soup back into, to keep warm. Season the soup, and ladle into bowls. Swirl in a little of the yoghurt and sprinkle over a couple of the chickpeas and a sprig of fresh coriander to garnish and serve. Some little naan’s would be lovely on the side but I forgot to buy any so had granary toast, which works equally well!

The soup will keep up to four days in the fridge and re-heats very well. In fact it reminded me I must buy a new portable soup container after accidentally melting mine at work the other week…

You can also watch me cook this recipe on Youtube:


Enjoy!

Wednesday 16 November 2011

Apple Streusel Cake

This is a new cake for me, as I’ve never made, or remember eating a ‘streusel’ topping before! I recently picked up a packet of bramley apples for my Christmas stuffing and had two spare...There was lots of debates between myself over what to make with the remainder and then I spotted this cake in one of my friend’s book ‘Grandmas Favourite Recipes’ and with a morning spare (well, sort of, have never been good at prioritising!) I decided to have a bash at making it!

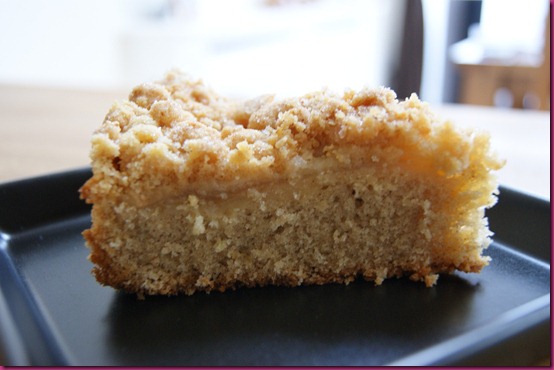
Whilst there are a couple of separate stages to the recipe (hello three mixing bowls!) its easy to follow and make. Its also a very nice cake to sit down and have a cup of tea with in the afternoon. I did eat mine cold, though I think it would be very good served warm as pudding, perhaps with a nice scoop of vanilla icecream! One thing that did surprise me is that the cake wasn’t overly sweet but completely in a good way, the girls at worked loved it and I hope you will too!
DSC00863

Whilst the streusel topping does make it a little more challenging to slice up, it did give the cake a nice edge and I found myself picking at the all the remnants in the in after cutting! I do love chef’s perks!

You will need a 23cm springform cake tin, lined

Serves 8-10

Ingredients:

115g butter (plus extra if greasing your tin - I am lazy and always use liners!)
450 cooking apples
175g self raising flour
1 tsp ground cinnamon
pinch of salt
115g caster sugar
2 eggs
2 tbsp milk
icing sugar to dust (forgot this bit!)

Topping ingredients:
115g self raising flour
85g butter
85g caster sugar

Method:

Firstly make the topping by sifting the flour into a bowl, rub together with the butter to form coarse breadcrumbs I.e. small lumps. Stir in the sugar

Pre-heat oven to 160fan/ 180/ gas 4

Peel, core and thinly slice the apples and reserve (I did this stage last)

Sift the flour, cinnamon and salt together. Separately beat the butter and sugar until light and fluffy, gradually beat in the eggs, adding some of the flour each time. Gently fold in remaining flour and milk.

Spoon the batter into your prepared tin, top with the apple slices and sprinkle over the topping. Bake for about an hour – due to the topping I found judging it hard so gave it an extra ten minutes! The topping should be firm and golden. Leave to cool down in the tin before opening the sides up.

Dust with icing sugar before serving. (I forgot this bit!)

DSC00868I'm also sending this one over to Bookmarked Recipes number#6!

Monday 14 November 2011

Banana Meringue Pie

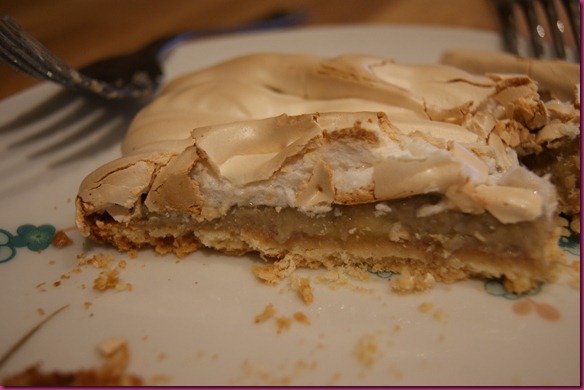
These simple tarts have a sweet banana and almond filling, with a crispy yet marshmallow-y meringue topping . The inspiration for the recipe came from an old Good Housekeeping recipe for pineapple meringue pie. However I have a fond dislike of pineapples (its the texture!), plus at the time of dreaming up recipe I had a surplus of bananas (remind me to look next time on the market how many there in those £1 bowls!) and with a little tweaking came up with this recipe!

Banana meringue 2

The tarts are also are my second video recipe for the Russell Hobbs Blogger vs Fans challenge! This week I got to play with the Allure hand mixer, which is really good. I’ve never had a ‘handheld’ mixer before so its rather nice to finally own one, even better in that its an excellent, well designed product. The main thing I love is the little LCD panel which tells me what speed I am at, and how long its been on for! If you like my recipe, please pretty please come over to Facebook and click on the ‘like’ underneath my video!


Being filmed cooking is one of the hardest challenges I have done! I am not naturally organised and when I cook it normally involves finding random ingredients and the hope it will produce something edible. Also me and meringue are not best of friends, being a relative novice but if I can manage it, I am quite sure it will be a breeze for you!

There are a few scenes not shown on the video – I never normally have a problem with eggs breaking but these were evil – I broke three and had to wash up the bowls halfway through! It did remind me of a less than fun time when I was in a supermarket buying eggs – I was carefully checking that none of them were cracked etc, picked one up and it broke in my hand! Truly nasty and I had to rather embarrassingly ask for some paper towels, I couldn’t wait to get home and wash my hands!

Somehow though it all came together, and the recipe whilst is unusual, it actually tastes really good! I originally thought these would serve 2 but the tarts were actually quite big so probably best to share between 4 of you!

Serves 2-4

Ingredients

2 x 10x10 dessert pastry squares
Egg spray or 1 small beaten egg
1 large whole egg, separated
2 bananas
1 tbsp cornflour
2 tbsp water
1 tbsp ground almonds

Spray the pastry squares with egg wash or beaten egg, score a line about 1cm in from the edge and make a few shallow knife dents, bake for 6 minutes at 180 fan/ 200, allow to cool slightly

Heat a small pan. Blend the cornflour and water, add to pan and bring to boil, when its started to thicken – it won’t take very long – stir in the mashed banana and almonds, beat for a minute and add the egg yolk, stir over a moderate heat for a further minute and then turn off the heat – it should be thick and creamy

Whisk the egg white in a clean bowl for no less than 5 minutes, slowly adding the sugar after it has started to whiten, beat in until the meringue is all glossy and white,holding a soft peak. Carefully spoon into a piping bag with a large star nozzle

Place the banana mixture in the centre of the tarts, pipe over the meringue and bake for 16 minutes or until crisp and cooked through. Reduce the heat if browning too much. Transfer to a cooling rack to cool down completely.

Best eaten on day of making. It still tastes great the next day but visually not so good...!

Banana meringue 6

Saturday 12 November 2011

Roasted Vegetable and Fennel Bulghur Salad

Oh how I love this salad! Its delicious freshly made served warm, and also in my lunch box the next day. Its what I like to call a happy dish, as it contains all my favourite vegetables and it can’t help but bring a smile to face when eating it too!

Makes two portions, Easy

Ingredients:


1 medium sized aubergine
1 courgette
1 red pepper
100g bulghur wheat
1 tsp marigold bouillon powder
2 tbsp garlic infused olive oil
1 tsp fennel seeds
Pre-heat your oven to 180o

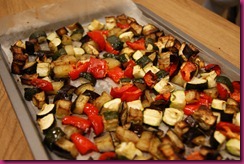
Cut all the vegetables into even sized chunks – around 1cm squares, toss with oil and place on a lined baking tray. Sprinkle over the fennel seeds and roast for 35-40 minutes, giving them a shake halfway.

BW roasted med veg 02.11.11 2

Meanwhile, make up the bulghur wheat by combining with the bouillon powder in a lidded dish. Cover with boiling water by just under a centimetre. Cover with a lid and leave to absorb the water for a good ten minutes, or until your vegetables are ready.

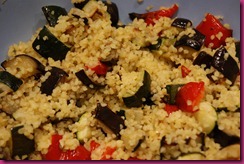
Once the vegetables are cooked, stir into the bulghur wheat and simply serve!

BW roasted med veg 02.11.11

Wednesday 9 November 2011

Sweet n Spice Pumpkin Seeds

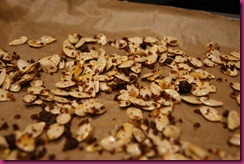
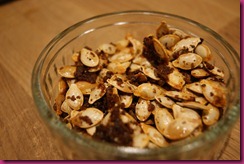
So did you keep your pumpkin seeds from Halloween? If not please get some and make a batch of these lush, very slightly addictive seeds!DSC00787

After making my Honey roasted Pumpkin, Pancetta and Coriander soup I couldn’t bear to part with the seeds, “waste not want not” and all that, and having bought some rather yummy treacle-y dark brown muscovado sugar for my sauce recipe, a plot was hatched and these sweet n spice seeds were a triumph of the snack world!

Ingredients:

50g pumpkin seeds
1/2 tsp sea salt
2 tsp dark brown muscovado sugar
1/2 tsp black pepper, freshly ground
2 tsp olive oil

Pre-heat oven to 190o

If your seeds are freshly removed from your pumpkin, give them a good clean up, discarding any fleshy bits, rinse well and place on a parchment lined baking tray, bake for approximately 5 minutes to dry out.

Remove from the oven and allow to cool slightly. Mix together the remaining ingredients, combine with the seeds and scatter loosely onto the baking tray.

DSC00779
Roast for a further 5 minutes, or until the sugar has melted and the seeds look dry.
Allow to cool for five minutes on the tray, then transfer to a serving bowl and snack away!
DSC00783They are so moreish and are a great way to use up your leftover seeds rather than going in the bin!
DSC00811

Monday 7 November 2011

Honey Roasted Pumpkin, Pancetta and Coriander Soup

Halloween has been and gone but if you still have a pumpkin or two hanging around then this is a great soup to use it in!

I bought on the market these ridiculously cute mini pumpkins, I added my pencil in the shot so you can gauge how weeny these babies were:
DSC00767
After a close examination, I realised just how fiddly carving them would actually be and so I opted to make something a little more edible with them, this combined with a few random ingredients that needed using and this tasty, warming soup was born! The pancetta isn’t essential and you could substitute a little more smoked paprika to make it veggie friendly.
The big orange Halloween style Pumpkins can be a little watery, in comparison to squashes designed for eating but by roasting the flesh first, and with careful seasoning, plus a blob of double cream this soup is a real treat, and its even better eaten the next day, as the flavours mellow together
Once you have peeled and diced up your pumpkin, please don’t throw away your seeds! Give them a clean up, rinse and keep your eyes peeled for my next blog post!
Serves 4
Ingredients
620g pumpkin flesh, cut into 1cm dice – this is net weight, my babies weighed in at nearly 1.2kg before trimming. Save your seeds!
15g fresh leaf coriander, roughly chopped.
1 heaped tsp smoked paprika
2-3 tsp clear honey
salt and pepper
Spray sunflower oil
1 onion, diced
90g pancetta cubes
1 heaped tsp marigold bouillon dissolved into 1 litre boiling water
Double cream for serving
Method:
Pre-heat the oven to 190o, spray a couple of baking sheets with oil and scatter over the pumpkin, spray with a little more oil and roast for 15 minutes, drizzle with the honey, toss lightly and roast for a further 10 minutes or until the pumpkin is tender
DSC00778
Heat a large saucepan, spray with a little oil and fry your onion over a moderate heat until softened, without browning, add the pancetta and fry until lightly browned. Stir in the roasted pumpkin, smoked paprika and stock, plus most of the coriander, reserving a few sprigs for serving. Cover and bring back to a gentle boil, simmer for five minutes.
DSC00784
Remove from the heat and blitz until smooth with a hand blender (I used my new toy) or in a liquidizer. Season well, serve garnished with a little cream, a few sprigs of coriander. And your special seeds, which I will add here shortly!
DSC00804

Friday 4 November 2011

Winter Barbecue Sauce with Sausage Bites - Video Recipe!

Dearest friends, family and visitors to my blog – please be kind to me – for I am finally...cooking on film! Its possibly the most scariest thing I've done since agreeing to go para-sailing in Mexico a few years back but it was a lot of fun to do!

You can watch me here on Youtube or directly through Facebook


Over the next four weeks, I will be road testing four fabulous Russell Hobbs kitchen gadgets from their new Allure range and I have created some tasty recipes for you!

First up is my very special Winter Barbecue Sauce:

Which was made using this little beast - the Mini Ball Chopper:


The sausage bites are optional – the sauce tastes great so pair it with whatever meats or vegetables you fancy! The sauce has a perfect balance of spice, sweet and sour and is perfect for warming up a cold winters night!

The sauce takes 30 minutes to make, I oven baked some delicious ‘Jimmy’s Farm’ free range pork sausages, then cut them into bitesize chunks and speared with cocktail sticks. Great for serving up at parties!

Makes one large bowl of dipping sauce

1 medium red pepper, roughly diced
1 medium yellow pepper, roughly diced
1 red onion, diced
1 dsp of flora cuisine or olive oil
4 dates
1 bramley apple
Approx 2 tbsp fresh thyme, chopped, plus extra to garnish
3 tbsp red wine vinegar
160ml water

Sugar and Spice mix:
3 tbsp Natural dark Muscovado unrefined cane sugar
2 tsp smoked paprika
Scant tsp colmans English mustard powder
½ tsp cayenne pepper
1 tsp garlic puree


Method:

Step one:

Firstly, place the dates in freshly boiled water and leave to soak.

Heat the pan over a moderate flame, add the oil, heat through and add the onions, stir then cover with a lid. After 5 minutes add the chopped up peppers, stirring occasionally and keep covered. You want them to gently cook, not burn or brown too much, add a little more oil if needed.

Step two

Peel, core and dice the apple. Remove the dates from their bath, stone and roughly chop then add them along with the apples to the pan, stir and re-cover, gently simmer.

Step three

After a further five or so minutes, the apple should be softening, stir in the vinegar, stir well and allow to evaporate, stir in the sugar and spice mixture, cover and simmer for a further minute

Step four

Add the water slowly to the mixture, stir gently, re-cover the pan and bring gently to the boil and simmer for a further 2-3 minutes,stirring occasionally then remove from the heat

Step Five

Transfer the mixture into the mini ball chopper, blitz in a couple of bursts to lightly blend the sauce - you don't want to puree it. Then simply serve in a pretty bowl garnished with a few extra thyme leaves!


The sauce can be frozen without any loss in quality, and thawed quickly in the microwave for emergency dipping!

Thursday 3 November 2011

Pork Loins with a Red onion and Date sauce

Dates always remind me of Christmas (Is it too early to mention the C word?) as I remember my mum buying packets of Eat-me' ones in the market and they seemed to hang around for ages! Though as I got older I developed a real taste for them, and to me they are now like eating sweets.

I’d never really thought about using dates in savoury cooking before but when planning what to cook for dinner for when my brother came over the other night; post visiting the market and coming away with 3 packets of dates for a bargain price of one pound, this idea came to me, and I kind of winged it from there!


I didn’t really measure anything (no surprise there!) but have tried to remember what quantities I added. Will update if I think of anything else! 

Makes enough for two portions
Ready in 15 minutes

3 pork loin steaks  - I’m a girl and had one, two for my brother!
½ red onion, sliced thinly
6 dates, soaked in hot water for 15 minutes
Fresh mint to garnish
100ml or so of light vegetable stock (I always use marigold bouillon)
1 heaped tsp cornflour, made up with a tbsp of water
Spray oil

Fry the onion until softened over a moderate heat, push to the side of the pan and add the pork steaks and use a small plate or similar to weigh down, fry for about 4-5 minutes on each side, until cooked through and nicely coloured, re-distribute the onions, stir in the dates, and stock, bring to the boil and simmer for a couple of minutes, stir in the cornflour mixture, allow to bubble up stirring continuously until the sauce has thickened, and serve.

The pork would be lovely served with rice, but I was experimenting with some spare ingredients so ended up with minted aubergine slices, and a packet of new potatoes in garlic butter!


Overall it was a very tasty, quick and simple dish and I will be definitely using dates again in cooking, rather than sitting and eating them all straight from the packet! 


01 09 10