Showing posts with label Baking. Show all posts

Thursday, 11 August 2016

Chocolate and Almond Brownies - Gluten free and low #FODMAP

For these brownies they are definitely both gluten and wheat free, the FODMAP part is on the border - I did check them out with my dietitian as under FODMAP you are allowed 10 almonds - which after working out the total and scaling down is roughly 8-10 almonds per portion, so if you eat two, ahem, then they are taking you over that almond limit! Not that I ate two of course... that would never happen.. though I did have an amusing conversation at work today with a dental health nurse over a particular form she was showing me and after reading through it (as part of the project I am on) I did mutter the words 'is it bad I had a brownie for breakfast'! Apparently, yes. Oh well...

Baking is a passion of mine - it tends to happen quite organically without much prior planning and I love nothing better than destroying the kitchen and dusting everything with a fine scattering of icing sugar but following FODMAP has definitely tested my repertoire to the max and I've explored whole new areas of baking! After initial hit and miss I seem to be getting into a rhythm and these brownies are pretty darn good! The fact that there are just under 4 left out of 9 from the last night is a pretty good sign they are keepers! (though by the time I have now finished writing this up post a blinking windows update grr there are two!) B even gave them a 10 which is a huge improvement on the previous experiments!

These are not fudgey as some brownies but they are soft, light but not too light and chocolatey. I did umm and arr over putting rum in them but I did resist on this occasion. Maybe next time....(though I think am getting a reputation as at a friends annual birthday bbq the other night I was asked if my flapjacks had alcohol in them!!)


The one main ingredient in making these brownies a little on the squidge side - mashed banana. They need to be very ripe, on the edge of packing their bags and walking out the fruit bowl. You won't taste the banana but they keep the brownies so moist without lots of butter - I found with earlier gluten free bakes they were a little on the dry side but not with these!

Makes 9 brownies

Ingredients

100g butter
125g light brown muscavado sugar
2 tbsp golden syrup
75g rice flour
25g ground almonds
25g cocoa
1 tsp baking powder
2 small ripe bananas, mashed
2 eggs beaten
50g dark chocolate,chopped
2 tbsp flaked almonds

Preheat oven about 190o (my oven still flexible but basically a medium hot oven)
Line a square tin with baking paper

In a pan melt the butter, sugar and golden syrup until slightly foaming and syrupy, leave to one side

Sift together the rice flour, ground almonds, baking powder and cocoa. Stir in the mashed banana and lightly beat in the eggs.

Use a fork to gently stir through the melted sugary mix until combined. Fold in the chocolate chunks. Pour into the prepared tin, scatter over the flaked almonds and bake for 35-40 minutes or until just cooked through.


We had ours in a bath of soya custard (surprisingly nice!)

Thursday, 30 June 2016

Banana, Sultana and Choc Chip Muffins #FODMAP

Yesterday I was very lucky to spend it attending a full day workshop on Quality Improvement for healthcare, which working for the NHS as part of a project to improve patient safety it was super beneficial and very interesting. I am really lucky to work with a great bunch - and a great Trust which is committed to improving quality to benefit both us staff and patients. I knew the provided sandwich lunch would be a no go on FODMAP but I had planned ahead and took some leftover baked millet & veggies. However, the hardest part was in the afternoon when trays of amazing looking and smelling cakes appeared - there was glossy topped caramellos, fancy cupcakes and lots of other treats and not a single one was suitable! All I could think about was cake!!

So last night after dinner and still craving cake, I decided to try again with some FODMAP suitable baking, last weeks banana bread was not a huge hit but I decided to persevere with a the banana theme, mainly though as I had two very, very ripe ones to use up! After a rummage through my cookery books I dusted off a copy of 'the egg book'. Its not a book I've admittedly used very much but it does have a few good recipes inside... I chose the banana muffins recipe but tweaked it to be FODMAP friendly, also I increased the liquid to allow for the gluten free flour - which seems much thirstier, and changed the honey to maple syrup. I also had no ground almonds so subbed for ground rice too! Oh and I added some suitable dark chocolate chips and sultanas and left out the nutmeg!

The mixture looked quite sloppy and I easily filled 12 cases rather than the 10 stated! I didn't hold out much hope but was pleasantly surprised and it satisfied my cake longing! The resulting muffin was light and taste rather good even if they did stick super well to their paper cases! Oh and as ever I had great fun making a mess!


Make 12 muffins

225g gluten free plain flour (I used Dove's Farm)
3 tsp baking powder
25g ground rice
1 1/2 tsp ground cinnamon
50g light soft brown sugar
2 large mashed bananas
2 large eggs
2 1/2 tbsp sunflower oil
1/2 tsp vanilla extract
150ml soya milk, unsweetened
3 tbsp maple syrup
50g sultanas
50g dark chocolate chips (check labels for suitability)

Pre-heat oven to 190o

Sift the flour, baking powder, cinnamon and ground rice together.

Separately mix together the eggs, banana, oil, milk and maple syrup. fold into the dry mixture gently and stir through the chocolate chips and sultanas, spoon into prepared muffin cases.

Bake for 20-25 minutes or until lightly golden and a skewer comes away cleanly


Friday, 8 January 2016

Cheesy Baked Veggie Polenta

This week has a been a real eye opener over how people cope with restricted diets. I've had IBS for what seems like forever, along with long term functional dyspepsia, and I can be a bit picky yet at same time eating everything within reason but this week I had to follow 2 days of low residue ahead of a special MRI scan to see what was happening as its been driving me slightly crazier than usual. The leaflets only tell you so much, it was very unpleasant experience, and that was just the diet! My shoulder alone is still aching from holding it above my head for half an hour and my stomach has been so crampy, god knows what they inject you with but it did not go down well! Anyway, hopefully its one step closer to getting it sorted. And I have a whole new appreciation for anyone subjected to restricted diets! I missed veg so much! How do you cope?!!

Anyway, on a separate note I have learned to love polenta of late, prior to this week and had been debating whether to blog it but it is really lovely, just ignore the photos I took on my phone - golden yellow becomes big bird yellow!!

Previously I had always boiled polenta, and it was alright but I didn't really get it. was a bit too grainy for me. And then one day on some magical whim I baked it instead-and whoopee! Its a winner! The texture changes, and becomes fluffy instead and makes a great side on its own, or jazzed up with some roasted vegetables. Feel free to cook this without the veggies underneath, it makes a tasty alternative to mash or rice.

Serves 4

Ingredients

Veg:

1 red pepper
1/2 yellow pepper
1 tsp dried Italian herb seasoning
1 tbsp rapeseed oil

Polenta:
170g instant polenta (also known as instant cornmeal)
750ml veg stock (I used 1/2 tbsp veg bouilon powder)
50g grated extra mature cheddar cheese
1 tbsp good rapeseed oil or extra virgin olive oil

Pre-heat oven to 190o

1) Place the veg in a non-stick foil lined baking tray, toss with the oil and herb seasoning, roast for 25 minutes, or until softening and starting to brown


2) Meanwhile, heat the stock to boiling and whisk in the polenta, then using a strong silicon spatula stir until thickened -about 2 minutes - be careful its evil and will spit. Apron advisable. Remove from heat and stir in 30gof the cheese and 1/2 the oil

3) Remove the veggies from the oven, quickly splodge over the polenta, sprinkle over remaining cheese and drizzle remaining oil. Return to the oven and bake for 30 minutes, or until golden and fluffy

4) Remove from the oven, slice into wedges and serve. Wehad ours with some lush pork and cider sausages and home made onion gravy


Enjoy!


If my dish has whetted your appetite for Polenta do check out these other fab blogger recipes - 

I really want to try these fab chunky alternative to potato chips - Polenta Chips from Recipes from a Pantry

This heavenly gooey looking Saucy mushroom and polenta bake from Family Friends Food is definitely on the make list!

I think I need to try again with sprout tops - this Maple glazed sprout tops with polenta from Elizabeth's Kitchen Diary looks delicious and hearty, great winter food!

Last but by no means least are these fab looking Courgette & Basil Polenta Wedges from The Veg Space -they look like they would make a delicious snack too or for my lunch box!

----------------------------------

I have entered my dish in this months Extra Veg, from Fuss Free Flavours and Utterly Scrummy


Thursday, 15 October 2015

Banana Caramel Loaf Cake

A few weeks back, on holiday and staying with lovely family I'd had a rather lovely day out at River Cottage and despite being slightly tired from the driving, I spotted some ripe bananas in the fruit bowl and decided to do some experimental baking! To be honest most of my baking falls in the experimental category and with this I didn't look at any recipes, just used some loose baking knowledge and hoped for the best!! 

After a rummage through the cupboards (always a fun mystery and delight to use other people's kitchens and dishwashers!) I ended up making a rather delicious cake, which I am glad I vaguely scribbled down as the one slice that made it back to my home disappeared in about 30 seconds! Its sweet, lovely cinnamon smell whilst baking will make a tummy rumble and the cake fills that rumble very well! It was also very tasty cold sliced up!

Now I debated naming this cake recipe with the word Caramel in, because it doesn't... but I when you make up the cake batter its rather caramel like and if Dan Lepard can call his amazing muffins 'Chocolate custard muffins' without being chocolate custard then I decided I can too be loose with the terminology....!
See its caramel right?!


Makes 1 x 2lb loaf tin (I guess, its not my tin!)

Ingredients

100g salted butter
15g golden syrup
120g light soft brown sugar
1 large banana, sliced at a diagonal
2 large free range eggs
120g self raising flour
1/2 tsp baking powder
1/2 tsp ground cinnamon
1 tsp demerara sugar

Greasing spray or tin liner to prepare tin


Method:

Pre-heat oven to 160 fan/ 180 regular oven

In a saucepan, melt the butter, golden syrup and brown sugar until the sugar has melted and its slightly syrupy - about 6-7 minutes, put to one side

Sift the flour, cinnamon, baking powder together. Beat in the eggs then fold into the caramel mixture.

Pour half the mixture into the tin, place half the banana slices into a layer, pour over the remaining cake batter, then add the remaining banana slices as a layer, sprinkle over the demerara sugar and bake for 35 minutes, or until a skewer comes away clean.

Eat with lashings of custard.


Linky to Sneaky Veg

Tuesday, 11 August 2015

Peanut Butter Oreo Crumble Cake

Biscuits, biscuits everywhere is pretty much the theme tune to the last few days! There has been bashing, blitzing, slicing and dicing testing out break-ability and of course a little tasting here and there too! If you are wondering why then it was a because I was a sent a few packets of some Special Edition Oreo's to play with. I do like a challenge and had good fun experimenting with them! Something I don't often get the chance to do as we flat-share and they were thankfully away for a few days whilst I destroyed the kitchen with crumbs and using nearly every bowl we own in the process!


**I have received product from Oreo for this post. It is an entry to the Foodies100 Wonderfilled recipe challenge sponsored by Oreo, which marks the launch of two exciting new flavours: Peanut Butter and Golden. The delicious new flavours are available in all major supermarkets at an RRP of £1.08. To find out more, visit www.facebook.com/oreo**


After a lot of scribbling and buying random kids sweets that never got used (I am sure won't hang around long once I declare to my boyfriend they can be eaten, shh!) I ended combining parts of other recipes I had been making for years, along with pure experimental madness! It paid off as this cake went down very well at work! Its my final week in my current job, and as a result I was requested to make lots of cake - they had chai tea fruit cake yesterday and today received this Oreo cake - the finale on Friday my renowned Sticky Toffee and Orange pudding! Next week is salad week!!

This cake has a soft, custard laced base sponge, topped with a banana and peanut puree, then crumbled up peanut butter Oreo's and oats, then a shiny chocolate glaze, oh and the requisite sprinkles of choice! I am tempted next time to add more banana to make a thicker layer but stick to two if you are are less persuaded by the idea! I roast my own peanuts (shelled from monkey nuts) as they taste better for baking and have no nasties, then grind them fresh to order - un-ground they will keep a fair few months in a cool air tight container. 


You will need a 8 " square pan, lined with parchment paper

Ingredients:

120g soft butter
130g golden caster sugar
2 medium eggs
50g wholemeal self raising flour
25g porridge oats
10 Peanut Butter Oreo's
100g plain flour
5 tsp custard powder
2 bananas, mashed
1 heaped tsp cornflour
1/4 tsp vanilla extract
20g roasted peanuts
pinch of sea salt

Glaze ingredients:

50g golden caster sugar
3 tbsp milk
20g cocoa
Pre-heat oven to 180o.

Sift together the flours, salt and custard powder. In a separate bowl cream together the butter, sugar and egg, fold in the dry mix. Spread over the base of the prepared lined pan.

Mix the cornflour with 2 tbsp water, add to a small saucepan and heat - stirring constantly, once bubbling add the vanilla, then stir in the bananas and cook for two minutes. Remove to one side.

Crush the Oreo's to small chunks, about 5cm at the biggest - I found the end of my wooden rolling pin most effective! Combine with the oats and put to one side.

Add the slightly cooled banana mix to the prepared sponge layer and smooth over. Top with the Oreo crumbs and press lightly down, bake in the middle of the oven for 30-35 minutes or until the sponge has cooked through.

In a saucepan, melt the butter, add the sugar and cocoa whisking until smooth and the sugar has melted, then whisk in the milk to form a smooth, thick sauce and simmer on a moderate heat for 2-3 minutes or until lovely and glossy.

Spoon the sauce over the cake, then decorate with sprinkles of choice and allow to cool fully in the tin.


There has been a few of us Foodies 100 bloggers taking part and some other Oreo related treats for you -

Peanut Butter and Golden Oreo Pudding from Fab Food 4 All

Peanut Butter Oreo Moon Rocks from Utterly Scrummy Food for Families

Oreo Nutella Ice Cream Cake from Kerry Cooks

White Chocolate Oreo Blondie Brownie from Ellie Bee Bakes

Slow Cooker White Chocolate Oreo Brownies from Baking Queen 74

Hidden Oreo Cupcakes from Sophie Loves Food

Peanut Butter Oreo Milkshake from Foodie Quine


Friday, 31 July 2015

Brandy & Marshmallow Brownies

We love brownies here, and this makes the 5th brownie recipe I have blogged, though there has been lots of experimental's in between! This one took inspiration from my Banana and Rum Brownies, though I had run of out rum this time and had to borrow my boyfriends rather lovely imported Brandy and due to lack of brown bananas's I upped the butter quantity a bit. Fortunately the experimentation worked and it resulted in a heavenly batch of brownies that didn't make it past the day! They were made for my friend M's birthday and were very well received at the party!


You will need a lined 8"square cake pan.

Ingredients:


100g butter
150g golden caster sugar
50g light brown muscavado sugar
115g plain chocolate, broken up
2 eggs
2 tbsp good brandy
1tbsp golden syrup
100g plain flour
25g cocoa powder
100g dark chocolate chunks
1/2 tsp baking powder
2 heaped tbsp mini marshmallows
1 large very ripe banana  mashed up


Pre-heat oven to 180o

1) Melt in a saucepan the butter, syrup and sugars. Stir in the cocoa and baking powder and remove from the heat.

2) Meanwhile mix the flour, egg, brandy and banana together. Fold into the melted chocolate mixture. Scatter over the chocolate chunks and stir lightly so they start to melt into the mixture.


3) Spoon into the lined pan, sprinkle over the mini marshmallows and press into the cake batter lightly and bake for 35-40 minutes - my oven is quite slow but modern ovens are faster! A skewer should come out fairly clean, not as clean as cake mix but enough to show its just cooked! It should be cracking slightly on top.


4) Leave to cool in the pan for ten minutes then transfer on the liner to a cooling rack. Place in an airtight container when cool.


The brownies were moist, chocolaty and are a definite keeper! Plus you can pretend they are healthy-ish with the banana addition! You can't really taste it but it just adds to the texture in a good way!

Thursday, 25 June 2015

Lovely Layered Lemon Cake

Its been a few weeks of no baking, so it was time to come back with a bang! This was a fusion of a Delia lemon cake, but super charged with lashings of lemony cream! It vanished embarrassingly fast between 4 adults! I took mere scraps for my cake fiend friend at work! I have been also told I am most welcome to make again anytime soon...though as it is I've had to borrow a larger sized dress to attend a work summerball shortly, maybe I shouldn't make it quite so soon perhaps!


I followed a lemon cake I found online from Delia initially - though I misread slightly and added all the lemon's juice to the sponge - a happy accident really as I would do exactly the same second time around!  Also I cheated and bought a jar of lemon curd, no less than a classy jar of value lemon curd - it worked perfectly! Weirdly Delia's recipe on her site and the BBC one vary - after much puzzling it seems I used the bbc one! I have written it out to save confusion!


Serves 8:

Ingredients

175g self raising flour
175g soft butter
175g caster sugar
3 large eggs
1 tsp baking powder
1 lemon, juiced and zested


Line two sandwich pans and grease the sides. (I love cake release!) Pre-heat oven to 180o

Sift the flour, baking powder and sugar into a mixing bowl of a mixer (or use electric hand whisk), add the butter, lemon juice and zest, then the eggs, then beat until creamy, and light.

Spoon even amounts into prepared trays and bake for 30-35 minutes or until lightly golden and cooked through. Cool for 5 minutes in the tin then transfer to a cooling rack until cold.

Slice both cakes horizontally (don't worry, icing holds a multitude of sins!)

Spread three of the layers with a generous lashing of lemon curd.

Filling:

300ml whipping cream
1/3 jar lemon curd

Whip the cream till starting to thicken, then beat in 3 heaped tbsp lemon curd until thickened and stands in fairly firm peaks. 

Spread over a third of the prepared lemon cream mixture for the three prepared layers, topping with the final sponge. 

Lastly make up the glace with:

4 heaped tbsp sifted icing sugar
one lemon, juiced and zested
Sprinkles optional of choice - I used these super cute mini lemon meringues!

Sift the icing sugar into  a bowl, stir in enough lemon juice to form a smooth consistency. Spoon over the top of the sponge, scatter over the zest and decorate as desired.

Allow to set before slicing.


Trust me - you want to bake this cake - you will win friends! Though this is bad as it also means you don't get to eat as much of it...! Its so light, and lemony, and oh oh oh, and can I really fit one more slice in?

Tuesday, 12 May 2015

Sweet Potato Brownies

Yes, I did cross the naughty but nice brownie border and introduced them to vegetables. Surprisingly they made great buddies, resulting in that slightly gooey, soft yet dense brownie feeling but with a surprisingly stingy amount of chocolate! Therefore I can pretend they are very slightly healthier than your regular brownies... oh and for the record, no they do not taste like vegetable matter! I also used some extra virgin coconut oil, which really also you can pretend is a full blown health food in its own right... (I will leave you to draw your own conclusions, I have never pretended to be a nutrition expert!)


On the night I baked these brownies I hadn't actually intended to bake but halfway through grating what seemed like a never ending sized monster sweet potato to make our veggie burgers, I thought hmmm...lets bake something... there are after all only so many sweet potato burgers one can eat for dinner! I had baked once before with sweet potato, with not so great results but this time was a winner! Now I won't lie you must enjoy the flavour of coconut as due to the coconut oil it does give off the aroma - but if you enjoy that, then you will love these brownies!!

Next time I think I will try steaming and then mashing the sweet potato, as to be honest grating is my least favourite kitchen chore! Let me know if you try it the mashed way!

Makes one square pan:

Ingredients:

220g sweet potato, grated
2 large eggs
130g coconut oil
150g self-raising wholemeal flour
100g light brown sugar
30g cocoa powder
1 tsp vanilla extract
100g dark chocolate
25g white chocolate chunks
100g golden caster sugar
1 tbsp coconut nectar
1/2 tsp sea salt


Method:

1) Place the grated sweet potato in a bowl, cover with cling film and steam in the microwave for  minutes.

2) In a saucepan melt the coconut oil and sugars, and simmer on a medium heat for 5 minutes, then add the coconut nectar - it should sizzle a little add the dark chocolate and put to one side, stirring until melted. Pre-heat oven to 180o. 

3) In a bowl sift the flour, salt and cocoa together. Lightly beat the vanilla with eggs, and mix gently into the flour mix. Fold in the sweet potato, then the prepared chocolate sugar mix until just combined.

4) Line the pan with parchment paper, pour in the brownie batter and scatter over the white chocolate chunks.

5) Bake in the middle of the oven for 30 minutes or so, or until cooked but still slightly springy to touch and a skewer comes out relatively clean.


Cool in the tin for 10 minutes before lifting onto a wire rack.

Cuts into 8 or so pieces depending on appetite!

My boyfriend gave them 10/10 and that was before he knew there was sweet potato in them!


As my brownies used a sneaky vegetable in the form of sweet potato I have sent them over to this months Fuss Free Flavours and Utterly Scrummy's Extra Veg linky, held at Veggie Desserts this month:


If you fancy some extra veg check out these fabulous recipes from some great bloggers:

Butternut Squash & Spelt Cake from Fab Food 4 All
Carrot Cake Muffins and Apple & Custard Lasagne from Foodie Quine
Sweet Potato and Ginger Cookies from Rough Measures
Courgette Muffins from Recipes from a Pantry

Thursday, 19 February 2015

Polish Ham and Cheese baked Pancakes with Hardy's

First things first - before cooking this delightful dish make sure you have allocated enough time – it doesn’t take that long to actually cook but rushing around to make twelve pancakes, one by one is awfully time consuming whilst also crumbling up cheese, slicing ham, along with preparing a tray of potatoes and squash, and it results in a lovely, rather messy cheese splattered kitchen!
 
You see normally I am quite organised in the kitchen but I had got home late from work, and really fancied a cup of tea. So that’s what I did. So in turn I ran late, though in the end it all worked out fairly fine except for some slightly soggy broccoli. No one complained anyway that it was a bit late and we all had seconds, so I am not sure really why I get into such a tizz! I do like being punctual even if I am working to my own little schedule in my head! Though I may at one point declared if I were to offer pancakes again presume I have gone crazy!

I think I may have mentioned before that my roots are a little bit Polish but I have never really explored Polish cuisine other than picking up the odd packet of ready made Pierogi (and the fun time I accidentally bought sweet cheese ones and served with a garlic butter sauce!) and this recipe by no means is particularly Polish in origin, though it does use a rather tasty ham called Szynka Swojska, which was wrapped in some kind of netting and proved fun to remove, plus a cheese that was labelled as being a soft cheese, but on opening it was actually rather crumbly upon touch and more resembled a cottage type cheese but without the watery gloop part! I will have to look next time in the Polish shop more closely to find its other name! Fortunately it also melted into the ham fairly well! I think next time I would add more cheese - as the last few pancakes were on the skinny side!
 
Recently I was sent a bottle of Hardy's 'Stamp of Australia' Sparkling Chardonnay Pinot Noir - its a new variety on me and I am a fan! When it comes to sparkling wines I do like Champagne but I can't afford it and normally we tend to buy Prosecco for special occasions, though this sparkling Chardonnay is definitely a serious competitor! I am no wine buff but I really liked the lightness of this one, its small bubbles bursting with a light citrus note on the tongue with an almost creamy, smooth roundness to it makes it most drinkable for all tastes! My boyfriend is not normally a fan of chardonnay as it tends to be drier (perfect for me!) but even he enjoyed this without adding a splash of raspberry syrup! It complements the smoked ham and slightly sour cheese flavours very well but even on its own its a very pleasant glass of bubbly. A keeper!
 

Serves 4-6

Pancakes:

180g plain flour
5 eggs
400ml milk
Pinch salt

Sauce:

250ml milk
250ml water
1 heaped tsp vegetable bouillon powder
1 tbsp finely chopped rosemary
6 tbsp grated extra mature cheddar
2 tbsp cornflour
6 cherry tomatoes, halved

Filling:

500g diced Szynka Swojska (cooked ham) cut into small strips
275g Polish soft cheese  - crumbled

For frying - butter or spray oil

A large sheet of greaseproof paper -

Start by making the pancakes. Sift together the flour, salt and beat in the eggs. Add the milk bit by bit to form a smooth batter. Season with salt and pepper.

Heat a heavy based frying pan and add a little butter or spray oil, add a ladleful of batter and swirl around quickly to form a thin pancake. Cook for about two minutes then flip, and cook for a further minute or until cooked through. Place on the prepared baking paper, and repeat with remaining batter to form roughly 12 pancakes.  Alternate the cooked pancakes with the greasing paper to stop them sticking to each other.

When your pancakes are all prepared, pre-heat oven to 200o. Lightly grease two large baking dishes.

Place a pancake on a board or clean counter. Spoon over ham and a litte cheese, roll up and place seal side down in the dish. Repeat with remaining until all filled.

Meanwhile boil together the milk, water and bouillon. Slacken the cornflour with a little water and when the milk mixture is boiling, stir in the prepared cornflour paste, whisking all the time until thickened. Add the rosemary and 2 tbsp of the cheese. Pour over the prepared pancakes and sprinkle over the remaining cheese and tomato halves.

Bake for 25-30 minutes or until golden and bubbling.


Sorry there are no pictures of it plated it - it was gobbled up fast by my family and lovely neighbour who popped around for her share as she had never had them baked before! For the record I served mine with broccoli, and a tray of roasted new potatoes with cubes of butternut squash.


Many thanks to Hardy's for the wine samples. All opinions, text and photography remain the property of Anne's Kitchen and prior permission must be sought before use elsewhere. 

Wednesday, 3 December 2014

Vegan Baking Adventures with Marmalade and Sweet Potatoes...

Recently I was set a little challenge.. well a last minute game changing challenge even to make some cakes for my friends Animal charity stall – and the twist in that they needed to be Vegan! Now dairy free is easy, I make plenty with with oil or butter substitutes without breaking a sweat but eggless? The glue that binds the ingredients lovingly and makes them rise? That’s a whole new story to be written! I have once made some vegan muffins but I repeat the once part, they just didn’t do it for me. By some miracle, a little googling, an hour slowly losing the will to live in the shop trying to find the egg replacer stuff with no help from customer services - apparently it was in stock but the aisle was upstairs but upstairs is clothing etc so in other words no idea whatsoever, and eventually finding it myself in the racking above the special diets section, on tippytoes trying to grab the box I somehow pulled it off – it was not easy but I am quite proud that both cakes were most edible and didn’t lack in any areas flavour wise at all!


The first cake was made fairly on track with the base recipe for a sweet potato spice cake, though we made an alternative topping using some scary dairy less cream cheese (note do not sniff it!), icing sugar, marmalade and a little vanilla, oh and something new to me in being vegetable shortening, and a little vegan margarine. I have a unique selection of ingredients right now to use! The icing was a little runnier than I would of liked slicing it up but it did stay on mostly so that’s the main part! Overall the spicing of the cake was so tasty – fragrant clove, cinnamon and ginger worked in a glorious harmony together. Even the weird smelling frosting was rather tasty, resembling the slightly sour creamy like topping you get on carrot cake. The sprinkling of crystallized ginger and crunchy toasted hazlenuts finished it off perfectly.

The plan:


The Finished cake:

Second up was a really gorgeously moist chocolate orange and marmalade cake, topped with a gooey chocolate frosting I made with a little of the marmalade, some icing sugar, a squeeze of orange juice, the zest and a dash of cocoa powder. The marmalade was sent to me by Robertson's in a special edition Paddington Bear jar - I love marmalade and the jar vanished fast!


The sponge itself was adapted from a Nigella storecupboard chocolate cake recipe, which I jazzed up with my favourite Polish dark cocoa powder, half a fresh orange juiced and a scary new item to me known as egg replacer, mentioned at the top of this post! Somehow the magic worked and produced a gooey, almost brownie like chocolate orange heaven! I honestly feel like converting to camp no egg now it was so good! I will make it again, measuring this time what I did and post the recipe in full for you to enjoy!


So any tips out there for first time Vegan bakers? Its definitely something I will explore further and hopefully share my journey with you!

Sunday, 26 October 2014

Banana Bread Bundt Cake with Chocolate Glaze

Every week despite our small household of two we go through a lot of eggs - from simple omelettes for supper to baking all sorts of lovely cakes or just a simple egg wash on something naughty but nice like a homemade sausage roll, and buying free range is the bare minimum of quality for us. Also with thanks to the Lion Quality Mark on the eggs we buy, it guarantees that they have been laid by hens within the UK, and are produced to the highest standards of food safety. Eggs are full of nutrition too so you can pretend that cake is healthy too! The egg white nutrition part in particular is protein rich, carb free and low in fat. Okay so yeah the rest of the cake is a maybe a bit more carby but its winter afterall and we need more insulation!

This gorgeous Banana Bread Bundt Cake with Chocolate Glaze makes no exception and naturally contained free range eggs, all date stamped with the Lion quality mark on them. It also means the eggs were stamped with a date, so I can tell how fresh they are, plus the laying hen has been vaccinated against salmonella. Something I really don't want to give to my loved ones along with a nice piece of cake! I was an 80's baby and only vaguely remember the news back then but what I do remember was Salmonella being all over the news, how fortunate we are now!


Moving on to the cake  the lovely Betty Ann from the Asian in America website gave me permission to post this recipe, after I had spotted it in her archives, that she had borrowed from a book – a fabulous sounding one called "Breakfast for Dinner" by Lindsay Landis and Taylor Hackbarth. I really love how recipes that work get passed between people – as you know they are loved and by baking them for new people to love, you therefore spread the love around! Cake also equals happiness so not only are you spreading love you create happiness! Something this world is in short supply at times with so much sadness amongst us, we have to also remember there are good people too and that love will always win.

Also as its from an American website its in cups so apologies as I know for some this can be off-putting but I have translated the butter for you as I already own measuring cups and used them for the dry ingredients and converted the temperature. (I adore my Russian Doll ones and can highly recommend them!) I made a different icing compared to the original version, mainly as I forgot to buy cream during a bit of a daft moment in the the supermarket and I didn’t think the crème fraiche I had instead bought would be quite the same in the icing…also I used sultanas as the raisins have gone missing! I swear there was a bag in the pantry…think I need to have a good tidy up in there!

Anyway I digress – this cake was delicious! I adore the regular banana bread I have made a zillion times from the Avoca cookbook but after falling in love with my bundt tin all over again thanks to cake release spray from Dr Oetker, when this popped onto my laptop screen I knew it had to be my next bake! Miraculously for once my oven didn't ruin it too! (lots of issues!) Its bananary without being in ya face nananana and the little drizzle of chocolate icing completes it! I also got to sneak over some Christmas tree sprinkles too despite it only being October! It is of course also a fabulous way to use up neglected bananas!

*You will need a large bundt tin - mine has a 24cm base and is quite deep*

Ingredients:
2 ½ cups plain flour
1 teaspoon baking powder
½ tsp bicarbonate of soda
½ tsp salt
1 cup caster sugar
¾ cup Butter (171g)
2 large eggs
3 large bananas, mashed
1 tsp vanilla extract
½ cup milk
½ cup sultanas (or raisins)

Glaze:
4 heaped tbsp icing sugar
1 heaped tbsp dark cocoa powder (I always use a dark one from the local Polish shop)
Sprinkles of choice

Pre-heat oven to about 180o

Sift together the flour, salt, bicarb and baking powder.

In a mixer, unless you are feeling particularly strong cream together the butter and sugar until light and fluffy, then add the eggs one at a time, until well mixed. Mash the banana and add along with vanilla, mix again to just combine.

Add a third of the dry mix along with a third of the milk, and repeat until all mixed well. Stir through the sultanas and pour into the prepared bundt pan, smooth over.

Bake in the centre of the oven for about 45-50 minutes, or until a skewer comes away clean and its lightly golden on top. Your kitchen will smell rather lovely at this moment and you might want to dive in. But resist the urge, let it cool a little - say 10-15 minutes before releasing the sides of the pan/ turning onto a wire rack (will depend on your pan!). Allow to cool as long as you can endure before making the icing.

Sift together the icing sugar and cocoa, add a teaspoon of water a time until you have a desirable consistency and spoon over the cake. Add a nice scattering of sprinkles over the top of your choosing.

Ours lasted 24 hours. Probably would keep for a few days.


With heartfelt thanks to Betty Ann for sharing this wonderful bake, and in turn the original recipe keepers Lindsay Landis and Taylor Hackbarth for creating such a lovely treat!

Disclaimer: I was not paid to mention British Lion Eggs but its something I do really believe in and I received an electric egg boiler as a gift which I am slowly mastering!

Tuesday, 21 October 2014

Nectarine and Almond Yoghurt Cake slices

My dad turned up the other week with a silicon cake pan, my heart sunk a little admittedly as I already have way too many pans vs available space, plus it was silicon, which is not my most favourite bakeware item… however maybe, just maybe I am being swayed by the lure of silicon as I have to admit the cake slices came out perfectly from the pan, and it cleaned so easily for once! Something which had deterred me from others that would not clean for all the tea in China... Though I did admittedly give the pan a quick spray of Dr Oetker's cake release spray just to be safe!

Anyway, Sunday night came around and I was getting a little fidgety in the kitchen, impatiently waiting for something else in the oven to eventually decide to bake (it does help if you properly convert the cooking temperature from overseas recipes!) and my mind started wandering.. bad timing as I actually had a job interview the next morning and instead of reading up and rehearsing things to say other than 'hire me' in a squeaky voice, I was erm sorting through the baking cupboard and peeling manky leathery skinned nectarines – I think procrastibaking is the best term here!! I must of got some rehearsing done as I actually did get hired! Somewhat of a relief after having to change career due to my wonky knees and a few months of worry!

Now referring back to the manky leathery skinned nectarines, I really hate wastage but all four of them had ripened at the same time and I just didn’t manage to eat them when they were just right, you know that special time between 02.30 and 02.31 on alternate Tuesdays! I half heartedly peeled them and whilst they were a little mushy they were not fortunately mouldy and I decided to bake something with them instead… the cake pan happened to also still be in the kitchen and I thought well sod it, lets have a go…what's the worst that can happen...


And I am glad I did, as in the process of rooting through the cupboards I discovered a forgotten bottle of some rather lovely bitter almond essence and they worked a dream together! It has a lovely, almondy amaretto like taste and a little goes a long way! 

Ingredients:

125g caster sugar
80g soft butter/ margarine
140g self raising flour
1 tsp baking powder
2 tbsp flaked almonds
2 eggs weighing 120g
50g greek yoghurt
½ tsp Bitter almond essence
2 ripe nectarianes, skinned, de-stoned and chopped into small  pieces

Cream butter and sugar in a mixer. Beat in eggs and essence, then the yoghurt, flour and baking powder. Stir through the nectarine chunks.

Spoon into your prepared mold or cake tin, sprinkle the almonds over and bake for 18-20 minutes or until lightly browned and a skewer comes away clean.


Allow to cool for 15 minutes in the tin/ mold and gently transfer the slices onto a cooling rack. Store in an airtight container when fully cooled down.

The resulting slices were light and airy, the gorgeous aroma of almonds hits your nose as soon as you open the tin and they roughly lasted about 24 hours! I am sure you could substitute the nectarines for any other stone fruit successfully too.


As my cake slices used up the last two, slightly leathery but not quite mouldy nectarines up and the last few spoonfuls of some yoghurt, its my second entry into Elizabeth's Kitchen Diary's 'No Waste Food challenge' which is being hosted by the lovely Vohn's Vittles for October! You can see my other entry - a fruit gratin here.


Tuesday, 7 October 2014

Fruit Bowl Gratin

Now its starting to get a bit chillier and the nights are drawing in pudding starts becoming a warm or hot pudding and in typical style all the fruit in the bowl was super ripe and ready at the same time - and there is really only so much fruit we can eat in one sitting! I have in the past made jams or the odd upside down cake but apples are not something I bake often with, especially the weeny size gala's we had lately! Also really not enough fruit to justify a jamming sessions!

Whilst trying to decide what to make with it all I spotted this Apple and Pear Gratin recipe on the Baking Mad website, who had also got in touch with me recently about recreating one of their recipes and this fruity gratin dish popped up. It sounded intriguing, we had everything in or near enough and decided to make it together for pudding! 

It was really good to add something easy to the pudding repertoire and it will be a keeper recipe for next time everything ripens at once! I think it could easily be scaled up or down to feed how many need pudding! It might just well feature next time my dad's over for dinner as those nights have to involve pudding and it can be a bit of a challenge getting everything ready after work but this gratin was so easy to make and can fairly easily fit around whatever you are making, adapted to what needs using up in the fruit bowl!

When it comes to buying eggs I will only ever buy free range at a minimum - I usually pick up the mixed weight trays in Sainsbury's which are a bit cheaper compared to pre-sized trays and guess by eye their size! When baking sponge cakes I always start by weighing the eggs anyway, so it doesn't make any difference to the recipe anyway! Buying cage free is important to me, I can't bear the thought of chickens kept in cages, with nowhere to move and certainly no life for the poor birds kept in those conditions. I am sure you have seen the videos and as I mentioned before, buying eggs in larger and mixed quantities helps keep the price down - I paid £2.40 for 15 free ranger's in Sainsbury's which is more than affordable. We go through a lot of eggs here and can go through a tray a week easily!


As my fruit was odd shapes and sizes, I made up the difference by adding plums to the apple and pear mixture, which went deliciously well together! I do love discovering a recipe that I can play around with and it also stops any waste! All of the above fruit was so ripe it was about to leave home by itself so its great to have a good use to it!

Recipe adapted from Baking Mad

Serves 4

You will need a large baking dish or 4 individual ones

Ingredients:

250ml milk
1 dsp butter
1 cinnamon stick
4 free range eggs
3-4 apples
2-3 pears, conference
2 plums
16 tsp golden caster sugar

Topping:
4 tsp Light muscovado sugar

Method:

Melt the butter in a large saute pan, pre-heat the oven apx 200o/ Gas mark 6

Peel the fruit, remove cores and cut into large chunks, add to the pan along with the cinnamon stick and 8 tsp of the caster sugar, gently cook for about ten minutes or until the fruit is starting to soften

Beat the eggs, add the milk and remaining sugar.

Remove the cinnamon stick and place the fruit along with any juices into a suitable baking dish (note it will need grilling, best to read this bit first!) and make into a even layer

Pour over the eggy mixture, bake for 18-20 minutes or until lightly golden and set.


Remove the dish from the oven and sprinkle over the muscovado sugar. Place under the grill on high heat, and caramelise the sugar - about 2-3 minutes.

Allow to cool slightly and serve. A nice scoop of ice cream would be welcome but we sadly have none in but a splash of Devon dream was lovely, though in all honestly its rather delicious by itself!


Despite some reservations over what the finished result would be like, afterall we don't often combine egg and fruit together in the same dish, we actually loved this pudding so much! Its sweet, fruity and really very tasty! The egg sets to form a souffle type texture and the caramelised sugar on top makes it that bit more special! I had to wait for my portion as I had dashed out to my pilates class but I came to back to 3/4 empty dish so my boyfriend clearly approves of this recipe! 

As I saved the fruit from being wasted, I am sending this over to Elizabeth's Kitchen Diary's 'No Waste Food challenge' which is being hosted by Vohn's Vittles for October. 


Disclaimer - I received a  package of sugar and flour from Baking Mad and personally chose this recipe to make and received no payment, images remain the property of Annes Kitchen. 

With thanks to Sainsbury's who provided vouchers to cover my ingredients and time making a Free range Egg recipe.

Tuesday, 23 September 2014

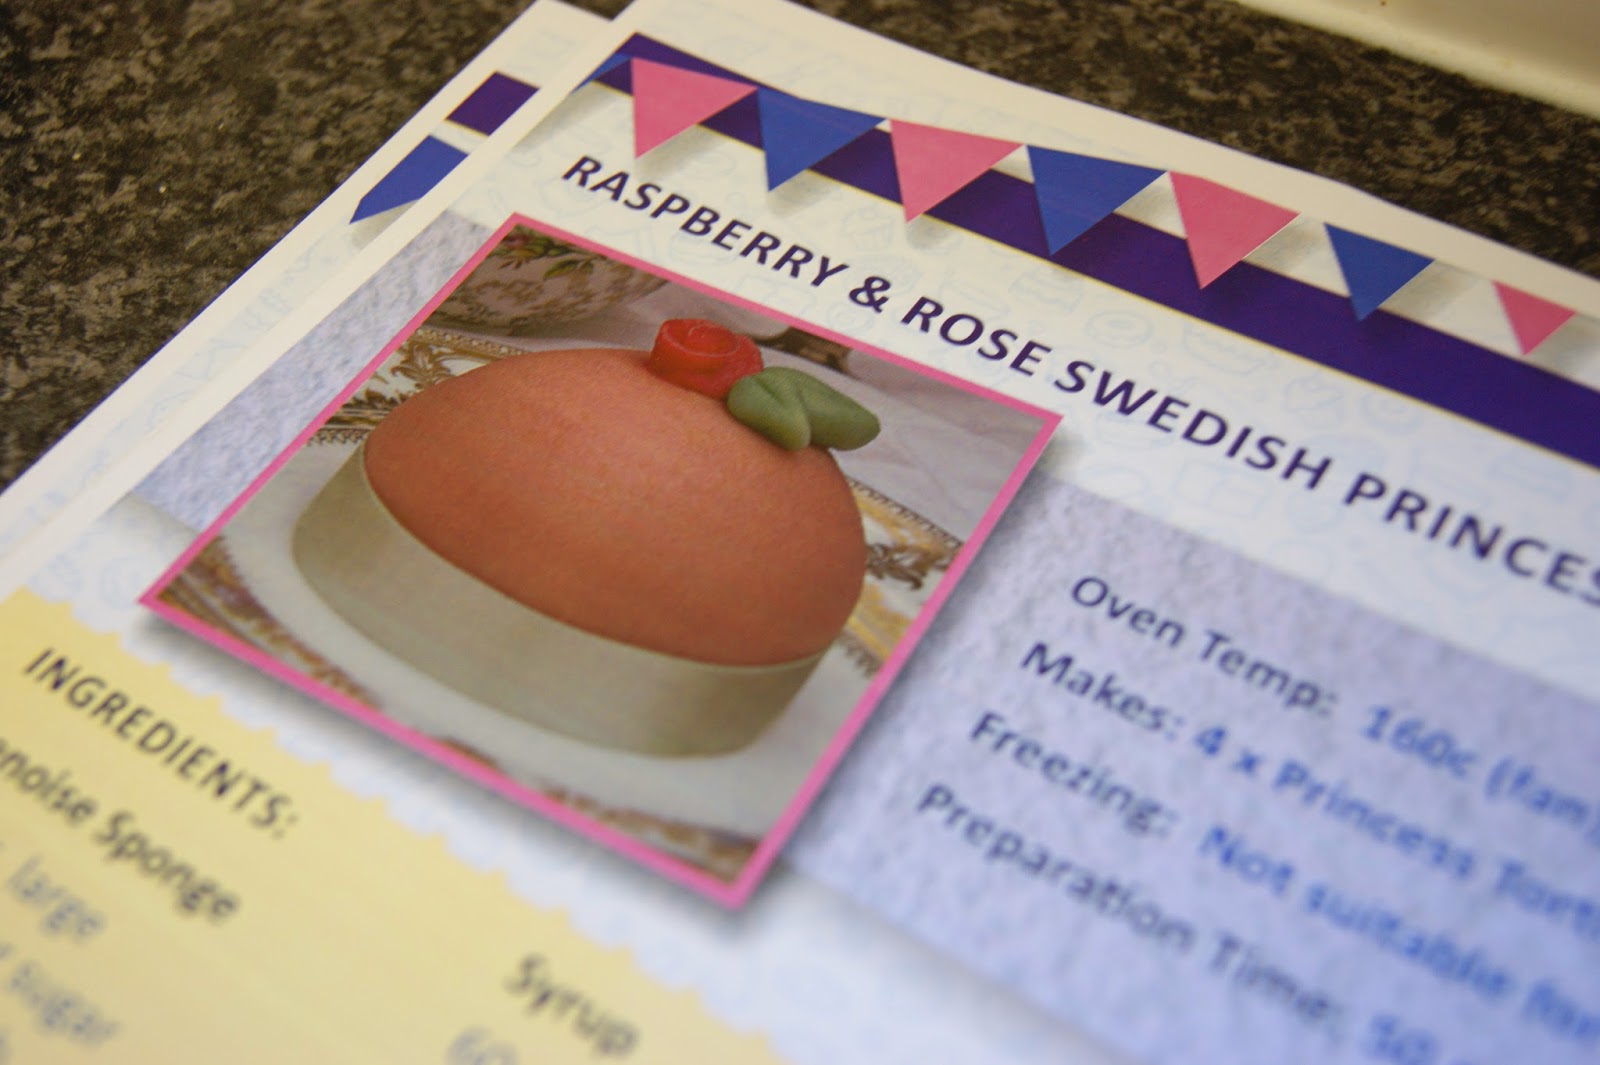
Raspberry and Rose Swedish Princess Tortlettes for #GBBO

Firstly - apologies for my complete internet silence - as posted last week we have no working internet at home, thanks to a naughty fallen tree and CableCom seem in no hurry to re-connect us! However a friend has saved the day and I am stealing borrowing her data to post this in the meantime! Oh how I missed you Twitter! And Facebook! Oh and my Instagram! I have so much to post it was hard to decide what would be first and whilst I have not written out the full recipe - I will if there is enough interest and if I can get permission I wanted to share these bakes, which were a definite first for me! Cheeky minded friends have nicknamed these 'booby cakes' but I will leave you to make your own minds up. I kinda thought they looked a bit piglet-y...

Anyway I am a huge Great British Bake Off fan and when the nice people at Stork offered me to bake along with a recent episode, I rather hesitantly agreed... see I am a fairly good baker but certainly no expert, more the muddle through and hope for the best kind of baker, not to mention too our evil non-temperature gaging oven - we are measuring as they did in Victorian times - stick your hand in and see how toasty it feels! Though after realising I didn't have anything better than to watch GBBO that evening and a I am a firm believer of its better to try it than regret it club, I replied with those fateful three letters... YES!


When I eventually sat down to watch that evenings Great British Bake Off, in the opening credits this weeks bake was narrated as one of the 'Most complicated'........ Ah ha this all makes sense now. This is why we didn't fill in that Bake Off entry form......

..Three hours later, back slightly aching and also after my colleagues discovering I was a secret food blogger (including our post room guy who kindly accepted my giant hamper!) my little pink beasts were eventually born!

Now I won't lie, there are several stages to this bake, lots of measuring, rolling teeny amounts of marzipan whilst turning shades of pink and green but we did manage it, even with a wonky oven and tiny kitchen so I a quite proud! Here are a few images for you to give you an idea:

Measuring the Genoise sponge..
Assembling my Tortlettes...


So these are my very first ever Swedish Princess Tortlettes, that I made in conjunction with Stork.
I somehow won their week though so they must look good! What do you reckon of my efforts as a complete novice to Creme Patisserie, Genoise sponge and tiny cakes in general?


Many thanks to the Stork team for my hamper to make these!

Disclaimer: I received no payment to make these. 
All images remain the property of Anne's Kitchen unless authorized in writing.
01 09 10