Friday, 30 December 2011

Amaretto Butterfly cakes and Goodbye 2011!

I spent a long time deliberating over my final post for 2011. Its been a rollercoaster of a year to say the least, what with illness casting a shadow on most of the year, moving house, a relationship break up, and more; I am honestly quite glad to see the back of it! I also learnt never to cook mushrooms, and then stir in polenta. Cement springs to mind both in texture and colour!

Whilst there were a lot of low points, there were also highs and new beginnings. I made beautiful macarons for the first time. Did battle with cake pops. I learned to love wholemeal pasta. My dearest friends celebrated the birth of their lovely little son. Plus I finally went back to college, something that had been on the back burner for a long time! And my recent visit to the oncologist was all good! What a year!!

So a big hello to 2012, may you be more joyful!

And so for my final post of 2011, something sweet was in order, and what could be more fitting than if I do say so myself, these rather gorgeous butterfly cakes! Move over cupcakes - butterfly cakes rock! These cakes also had two special purposes - firstly as mentionned above, to celebrate the birth of my friends little boy, and secondly I was taking them to meet a very dear friend, who I shall name as M on here, whom I first got talking to many years back via a food forum, and finally that day we were meeting face to face! Needless to say we talked about food mostly and put the world to rights. She is a special lady, and I hope 2012 is amazing for both her and her lovely husband!

When I was growing up my mum was a child-minder, and she ran a playgroup at the local church hall. To raise funds (I presume slightly here!) there was frequent bake sales and I have fond memories of the kitchen being filled with all sorts of cakes but my favourite were the butterfly cakes! How pretty they were to eat and most importantly, how good they tasted! Nothing beats a home made cake, and whilst my icing skills are erm rustic, to put it politely I think that’s half the charm of them!

Whilst the ones my mum made were definitely aimed at children, these ones are all grown-up with a naughty spike of Disaronno liqueur, and a heavenly mascarpone frosting on top! I also got to play with some new delicious 100% fruity jam’s sent very kindly to me by Nell from Superjam, who I got into correspondence with recently over a fantastic scheme they are running to host tea-parties for the elderly. You can find out more on their website! Their jam is delicious by the way, a nice balance of fruit and nothing dodgy inside!

At the time of making these for some unknown reason I really wanted to add some ground almonds but couldn’t find any in the cupboard, I think I must of used them all when making my Christmas swirls the other week… However these cakes were rather glorious and whilst I am still curious to how they would alter the taste, as these stand they are pretty darn perfect!

The mascarpone frosting is amazing, if I do say so myself. If you find yourself eating it with a spoon I shall not be held responsible. Its easy to work with, deliciously creamy and very slightly boozy and well, need I say more really?

Makes 12

Pre-heat oven to 160o fan/ 180o regular oven

125g soft butter/ stork margarine
125g self-raising flour
125g caster sugar
1 tsp baking powder
1 heaped tbsp good quality cocoa powder (Mix the cocoa powder with 2-3 tbsp of water to make a thickish paste)
2 eggs
40g broken up milk chocolate or chocolate chips
1 tbsp disaronno / amaretto liqueur

Start by beating together the sugar and butter, until pale and fluffy.

Beat in the first egg, then half the flour, repeat with second egg and flour, plus the baking powder.

Fold in the cocoa mix and liqueur. Stir in the chocolate bits. A hand mixer is advisable but do by hand if you like manual labour! I love my new allure mixer toy in particular! My Kenwood Chef is in storage, due to its size so this little hand whisk is an excellent substitute.

Fill the bun cases and bake for 20 minutes, or until risen and cooked through, allow to cool thoroughly before icing them. I used some pretty Christmassy cases from Sainsburys’.

Mascarpone frosting:

Fills 12 butterfly cakes, plus a little leftover for chefs’ perk.

250g mascarpone
125g icing sugar
1 tbsp disaronno / amaretto liqueur

Beat all the ingredients together, fill a piping bag with a large star nozzle.


Jam:


I used Superjam’s strawberry spread. This or a similar good quality jam would be ideal.

To assemble:
Once the buns are cool, take a small paring knife and carefully cut the top off, if they are not very risen just aim the knife slightly inwards, cut the removed piece in half to form two ‘wings’ and trim lightly if necessary. Repeat with the remaining buns.

Pipe a circle on the cut bun, leaving a slight indent in the middle, fill this gap with a good teaspoon of jam,


Gently place the wings carefully on and voila! You have pretty butterfly cakes!


Wednesday, 28 December 2011

Stilton and Port Pastries..

This post is another relating back to the giant hamper Knorr sent me! And there's still a little more to come!

Within the depths of my hamper, was a gorgeous chunk of Colston Bassett Stilton from Forman and Fields. Ten years ago this would of filled me with dread, infact I remember trying a piece of Stilton as a child and immediately spat it out and wondered why anyone on earth would want to eat something so mouldy but nowadays I can't get enough of the stuff! My conversion to blue cheese was thanks to an Italian restaurant surprisingly - I was told the soup of the day was Broccoli and Sweetcorn, though it actually turned out to be Broccoli and Stilton! I was hooked at first slurp!


Blue cheese is really the way forward I think, and this Colston Bassett Stilton was a real treat! It was gorgeously creamy, yet sufficiently 'stinky' and vanished at an alarming speed! It was definitely the highlight of the whole hamper for me!

Gaze at its beauty:

Whilst on its own, its perfect in every way and I ate *a lot* of cheese and crackers that week; I still did have quite a lot to get through I decided to play around in the kitchen a little, just for a change! Amongst these little savouries, I also made a delicious mushroom and Stilton pasta dish - a match made in heaven!

The pastries were not quite perfect in the looks department, a little tweaking is needed but ohhhh boy did they taste good! As a result I'm reluctant to give any real recipes for now but to give you a taster, I roughly mixed a few chunks with some sultanas that I had soaked in port, plus a handful of chopped pecans. This then got lightly mashed to a rather hmmm looking purple/grey concoction but at the same time was an amazing tasting mixture! I stuffed the mix into both little pasties and on to mini pastry squares and baked them until golden. 


Whilst delicious the slight downside was my poor pastry sealing and over generous topping as it leaked EVERYWHERE. Rather unashamedly I admittedly ate the scrapings. Waste not, want not!


Thursday, 22 December 2011

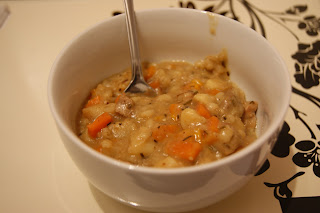
Spiced root Vegetable and Lentil soup

This year I seem to be on a roll with soups! Sometimes in the past they have been a bit hit and miss at times but so far the one thing that I've managed to do successfully is to make some gorgeous tasting soups! If only life was that easy too..!

Out of all my soups, this Spiced root Vegetable and Lentil one was really delicious and my favourite! Its very easy to make, low in fat and full of flavour! A real winter warmer! All you need is a nice hunk of bread and a spoon, then tuck in! You'll be warm in no time at all! The hint of coconut just adds a little something and I am sure you will love it too!

The ingredients for this one came out of my it seems never ending Knorr hamper sent from Forman and Fields. I really rated the curry powder they sent me, though despite my best efforts I've not managed to get my hands on their recipe for it! I guess to try substituting it for a standard spice mix, and tweak as necessary.

Whilst I have used a Knorr chicken stock pot, if you are veggie simply substitute accordingly.

Serves 2-3

25 minutes Easy
Re-heats well

½ white onion, finely chopped
250g carrot, peeled and diced
125g parsnip, peeled and diced  
1 chicken knorr stock pot into 750ml hot water
40g moong dal chilka lentils (or similar lentil)
2 tbsp unsweetened dessicated coconut
1 heaped tsp medium curry powder 
S&P
Spray oil


Spray some oil into a saucepan and heat, gently fry the onion for a couple of minutes to soften but not colour. 

Stir in the carrot, parsnip, lentils and curry powder. Fry for a couple of minutes then add the stock. Cover and bring to the boil, then simmer for 20 minutes, adding the coconut after 10 minutes. 

Transfer to a liquidizer and blitz until all smooth and lovely!

Some fresh coriander would be gorgeous here but alas I had none. Next time!


Saturday, 17 December 2011

Best of British Sausage and Apple Tart and Stuffing Meatballs

Following on to some of my earlier posts, I am now excited to bring you a couple of Christmas inspired recipes made using some lovely festive ingredients sent to me by Forman and Field’s, on behalf of knorr.   


Sometime back in November I was very lucky to receive a whole hamper full of goodies including everything to make a big Christmas dinner, including a giant Kelly Bronze Turkey, carrots, parsnips, chestnuts and more! With the various goodies I made a variety of dishes including this winter warming Turkey and Barley stew (which was so good I am making it again tomorrow for dinner!) 


One of the ingredients in my hamper was a container of 'Cranberry, walnut & smoked bacon stuffing'. Therein came my first challenge!

Hmm what to do with stuffing, other than well basically putting it up mr turkeys bottom? Whilst the  stuffing was good, it was also very different to others I've had. In fact it was a more like a very coarsely minced meat mixture, compared to the rather smooth sausagemeat I normally buy from the butchers. It was also nothing like the paxo type. Before playing with it, I decided to quickly cook a weeny bit of it to test the flavouring. However I then also burnt my tongue in the process which once again taught me the hard way to have some patience and let things cool first! It needed a little more seasoning but provided a good base, with lots of texture.

I decided some kind of tart was in order and decided to play around with the pastry and came with this rather cute looking gb flag:


As I had best of british ingredients, so I thought a Union Jack flag was quite fitting! However I am so used to cooking previously for two, the results were rather large but it did result in me having a lunch that had admirers the next day at work! I am very lucky working with people from all over the world; we have some very interesting food chats and smells in our staffroom! 

Best of British Sausage and Apple Tart

Makes two large tarts - serves 4
Easy

300g good quality sausagemeat stuffing
300g fresh puff pastry (roughly 2/3 of a block)
1 cox apple, thinly sliced
1 tsp English mustard powder, made up with 1 tsp water
Beaten egg to glaze (or egg spray)

Pre-heat oven to 180 fan/ 200 regular

Roll out the puff pastry until its the thickness of a pound coin, cut into half lengthways. Then cut a 4cm strip off each rectangle. Cut this bit into four thin strips lenghthways

Score a line about 1cm from the edge of each big rectangle, then fill this gap with the stuffing, to form a thin layer. Covered with the apple slices, and glaze with mustard mixture. 

Now take two of the reserved strips and carefully stretch them and place over the two longest areas of your flag, lightly egg glaze the overlapping parts to stick. Use the two shorter strips to complete the flag. Glaze all over with the beaten and, place on a lined baking tray. Repeat for the other block of pastry to give you two tarts, then bake for 40 minutes or until its cooked through. 

When cooked through, cut into half and serve with seasonal vegetables - I went with my favourite Brussels sprouts:


Whilst the recipe was very successful, I think next time will make four smaller flags as you lose some of the flag effect by cutting in half.

Enjoy!

Stuffing Meatballs:
Whilst with the remaining stuffing, I made a tray of little meatballs. These would be ideal as a canapĂ© as part of a festive buffet, however I must point out that they also do very well as an emergency breakfast when you’ve slept through your alarm and grabbed the first thing that looks edible from the fridge!

I made them by mixing 200g of the stuffing, with a couple of tbsp of apple sauce (shh from a jar!), rolled it into small walnut sized balls, rolled them in fairly coarse dried breadcrumbs and then baked them for around 25 minutes.


 They had both a good meaty flavour and texture, a dish I will definitely make again.

Thursday, 15 December 2011

Food Bloggers Unplugged


I've been tagged by both Suelle and Kim to take part in Food Bloggers Unplugged, a little exercise started by Susan at A Little Bit of Heaven on a Plate as a way of getting to know fellow food bloggers. The idea is that we answer 10 questions about ourselves, then tag five other food bloggers to take part, if they want to.


So, here are my answers:

What, or who, inspired you to start a blog? 

I’m a bit of a veteran…I joined as was trying to organise my recipes at home, my excel sheet wasn’t working on a practical level and then found I got asked by random people for my recipes, realised a website was a bit hmm scary and somehow stumbled upon blogger, mainly as was free and looked simple!

Who is your foodie inspiration? 

My dearest nanny Jean, who sadly left this world in August. She cooked simply but with good basic ingredients and always produced something wonderful. She made fantastic jams, marmalades and made sure no one ever went hungry. Her bread and butter pudding was the best I’ve ever eaten.

Your greasiest, batter - splattered food/drink book is? 
Despite being relatively new my Nigella Lawson’s Kitchen has quite a few splashes! Saying that I love my ‘Baking’ book, picked up cheaply years back from the dangerous shop for my purse that is ‘The Works’. Every recipe has worked a treat and I wouldn’t swap it for the world.

Tell us all about the best thing you have ever eaten in another country, where was it, what was it? 

I have two – sweet first was an amaretto & pistachio crème brulee in Brussels about 6 years ago. Was a basic looking local restaurant, in the (possibly!) Turkish quarter and it was perfect. Simple and delicious. Creamy, boozy, nutty. Heaven in itself! Savoury was an amazing gravy I had in Lille, I was eating with my dad in a fairly relaxed restaurant around ten years ago, we'd ordered roast chicken and it was soo soo good, it was served up on a wooden board which had this weeny pot of gravy and it was quite simply the best I have ever eaten! Perfectly savoury and unctuous.

Another food bloggers table you'd like to eat at is? 

I can never choose just one thing, I much prefer to pick on lots of little dishes so would have to just go to everyone on my blogroll I think!

What is the one kitchen gadget you would ask Santa for this year (money no object of course)? 

Erm it’s a bit far fetched but a magic clean up robot!
 
Who taught you how to cook? 

I taught myself using books and a very basic founding from GCSE Food Technology. Also learned to bake with mum growing up. That and greed!

I'm coming to you for dinner what's your signature dish? 

I always struggle with this as depends on my mood and who is my guest but my aubergine bhajis are my most requested dish! I’ve never had any leftovers!

What is your guilty food pleasure?

I have a weakness for mcflurry’s. I love them. Especially the new mint one *drool*

Reveal something about yourself that others would be surprised to learn? 

I prefer to drink bitter and ale, rather than the more ladylike drink of wine!

In turn, I would like to tag these 5 bloggers, although I hope they won't feel obliged to join in if they would rather not!

Monday, 12 December 2011

Wholemeal Penne, Pancetta and Cauliflower bake

This post probably should be titled as 'How to make a healthy-ish pasta bake!'

For the record I love pasta bake. Whilst there are admittedly a lot of things I love, pasta bake is definitely very high on that list! Though a little devil on my shoulder often whispers nooo however you can silence him with some little tweakings and this is my recent take on attempting a healthy and yet still satisfying pasta bake! Nowadays as I only cook for one, I was not initially wanting to cook for hours - this pasta bake was ready in around 30 minutes and was perfect for dinner the following night too.

I didn't measure anything, just for a change ha-ha but went by eye - was around 150g wholemeal penne, plus around 1/3 a head of cauliflower, plus about 6 strips of the smoked pancetta.

First up is the pasta – despite telling myself no more buying random dried carbs until I’ve used up the other 15 odd pasta and noodle variations, I couldn’t resist a bag of wholemeal penne on sale at 22p. *This was despite not actually liking wholemeal pasta*. I was determined however I would find a way of making it edible and this dish certainly does achieve that! Wholemeal pasta just sounds healthier so you can collect your first virtuous point. It has also been successful in converting me to its wholemealy goodness!

Next up is the sauce. Oh I do do do love a proper cheese sauce, in fact a white sauce was one of the first techniques I taught myself from a book many moons ago. However all that lovely butter and milk are not exactly skinny jeans friendly. As a result this was made using mostly vegetable stock, semi skimmed milk, a brief dusting of grated cheddar, and a heaped tsp of wholegrain mustard to boost its flavour. Collect shiny point number two!

Number three is the smoked pancetta = skinnier than bacon, dry fried, and as its full of flavour you don’t actually need very much of it – I merely broke it up and then dotted it amongst the cooked pasta. Hello there shiny point three!

And now to make it also contribute to your five a day without having to wash up more pans…whilst the pasta is boiling, add a good handful of cauliflower florets. These blend perfectly in with the pasta, both bulking it out and being good for you. In fact I think its the way forward.

Then to add a little eye candy with some red streaks to break up the pale but interesting look, I had half a red pepper lurking in the fridge, quickly he got sliced and thrown in at the end.

And so finally to assemble your healthy but delicious pasta bake; tip the drained pasta into a grill-proof dish, scatter with the crispy bits of pancetta, top with the sauce, poking it into the pasta, give it a little shake whilst you're there. Top with a brief handful of grated mature cheddar and a good sprinkle of dried breadcrumbs. Grill until its all golden and bubbling nicely.

And the result?


Not too shabby at all hey! It has all the good elements of a pasta bake but you can have seconds and still feel less gannet-esque. Re-heats very well. Enjoy!


My pasta bake is also an entry into this weeks Presto Pasta Nights, this week hosted by Rachel

Saturday, 10 December 2011

Joseph Joseph Baking Set Giveaway


Christmas is coming around very soon it appears! Time has just flown by this year! I’ve somehow managed to do nearly all of my Christmas shopping; however if you are still struggling for ideas on what to buy people then look no further than the http://www.find-me-a-gift.co.uk/ website. 


Find me a Gift have a really great range of gifts for every budget and for everyone in your life! You can use this link to go directly to their Christmas Gift section, which is conveniently split by mens, womens, couples, baby and more! http://www.find-me-a-gift.co.uk/christmas-gifts/

I particularly like their ‘bargain’ section, especially if you are looking for a few stocking fillers. Though are not for the serious minded person but will cause a few giggles I am sure! http://www.find-me-a-gift.co.uk/special-offer/womens-bargain-gifts.html

Obviously, I tend to frequent the kitchen section, and if you are looking to buy for a  foodie minded friend this Christmas, here are a couple of my favourite ideas to get you started:

Giant Jelly Baby Mould

My mum adores jelly babies and this is an ideal gift for her! He is so cute and would make a fun jelly!

Russian Doll cups

I am a real magpie for anything cute looking for the kitchen and just adore these glasses, they are just so pretty and would make water so much more interesting! 


And last but not least this rather gorgeous yet practical baking set! I love pastry, despite it being quite a fragile beast to work with, at the same time its so worth it! I am occasionally lazy and buy it ready made but I normally do try to make my own!
Rolling out the pastry to the right height can be a bit of a challenge, however with the Joseph Joseph rolling pin, it has these clever little bits that stick on the end to make this stage a doddle! To make your pastry that bit more special, the kit also comes with a silicon spatula for mixing up your filling, and a silicon pastry brush – perfect for lovingly glazing your finished product and both have a great little feature with a built in ledge to stop your mixture touching the work surfaces, a genius idea I think! Additionally the kit also contains a rather cute little pie timer to make sure your baked delights are cooked to perfection! A great little kit for any keen pastry maker! 

If you like the pastry set…the great news is that you could also win one! I am using a new toy called Rafflecopter to help collate entries, please e-mail me if any problems!

Wednesday, 7 December 2011

Turkey, Root Vegetable & Barley Stew


When I originally made this stew I was full of cold and at the time all I weirdly wanted was to eat cheese. Blue cheese to precise (damn you heavenly Colston Basset Stilton that calls me from the fridge!). However I persevered and the stew was actually rather delicious, in that winter warming one pot way. 

The merest hint of lemon in it lifts it nicely without being at all lemony, in fact you would be hard pressed to know its in there. I really wanted fresh rosemary but had to make do with dried; however in a slow cook like this I think it has a nice flavour of all its own, especially as its fresh counterpart can be a little over powering in a medicinal sort of way I’ve found at times..

A few moons back I spotted ‘oatmeal’ in one of those weigh what you want places and purchased some on a whim, and this stew was it first outing. It did thicken the dish slightly and certainly added a little something I can’t place my finger on.. I think the idea of adding it stemmed back to when I was in hospital earlier this year, amongst some er interesting dishes I sort of ate was a surprisingly edible chicken and oatmeal casserole. Needless to say my turkey stew though is a little nicer on the palette ;-)

Despite only ‘cooking for one’ nowadays, I really can’t. It’s impossible. At the same time I think its more economical anyway to cook for the upcoming days (or for the freezer) plus I love leftovers so making extra is never a bad thing! It does freeze relatively well, just thaw gently and add a splash of water to loosen if needed. It doesn't look as pretty when its re-heated but it still tastes great!

This recipe was made using some of the lovely things that Knorr sent me recently from Forman and Fields, I really do rate their stock pots. The stew was full of flavour and I can't wait to make another batch! Perfect for these chilly winter nights! It also smells gorgeous when cooking which is never a bad thing!


Makes 3 portions.

1 knorr chicken stock pot dissolved in 750ml hot water
1 medium carrot, diced
1 large parsnip, diced
4 tbsp oatmeal
75g pearl barley, soaked in cold water (you may need extra stock if you skip this stage)
½ white onion finely chopped
½ lemon zested
Lots of black pepper, pinch of salt
1 heaped tsp dried rosemary
400g turkey thigh meat, diced small

Takes 1 hour

Fry the onion until slightly colouring, add a little drizzle of olive oil and the turkey, brown all over. Add the vegetables and barley, stir in the rosemary, oatmeal and stock. Simmer for 30 minutes, stirring occasionally. Add the lemon zest, season well and simmer for a further 15-20 minutes or until the barley is tender.

Easy as that!

Sunday, 4 December 2011

Banana, Caramel pecan and Date Ice cream

Winter doesn't usually conjour up dreams of ice cream but strangely this winter I've already got through two tubs, hmmm must be comfort eating!

I don’t often make icecream, infact I will admit now that I’ve never made ‘real’ icecream using eggs etc, preferring to use condensed milk and cream. Health conscious you see ;-) As it uses fresh banana you could even trick yourself into believing its one of your 5 day! And nuts are good for you to, full of essential stuff!

This recipe came about firstly after buying far too many bananas in the market some weeks back (I only managed to look at banana's again this week!), secondly being slightly addicted right now to dates and thirdly, the caramel pecans, well, erm not sure how they came about but I love them and thought that it would work well with the banana flavour! Oh and fourthly (is that a real word, looks wrong?!) I had bought some double cream that needed using up that day, so had whipped it up to go into the freezer but reserved some for this icecream, to make it extra indulgent!

You don’t (probably shouldn’t) eat this in huge quantities. Personally I would rather have a small amount of something indulgent rather than a large portion of something low fat anyway!

Oh and the recipes is in ounces as accidentally pressed the wrong button on the scales, sorry!

Makes 1 medium sized tub - about the size of a margarine container

3 bananas mashed
7 oz sweetened condensed milk
1 tsp ground cinnamon
4 dates, soaked in hot water for 10 minutes, then roughly shredded
4oz whipped double cream
1 heaped tbsp. margarine
1 heaped tbsp. dark muscovado sugar

Firstly, make the Caramel pecans: 
Melt together the sugar and margarine. Butter would have been excellent here, however I forgot to buy any and improvised with the Stork I use for baking with! Once its bubbling and looking a caramel colour, stir in the chopped pecans to coat, transfer to a sheet of non stick baking paper and try to separate them. Once cooled down and set, roughly chop.

banana and date icecream 3

Using a hand mixer, lightly whip the condensed milk with the cinnamon and mashed bananas with the cream for a couple of minutes to combine thoroughly. Fold in the double cream, caramel pecans and dates.

banana and date icecream 1

Transfer to a suitable container and place in freezer. After an hour or so, gently fork through to break up any ice crystals and then repeat this stage a couple of times for a couple of hours until its frozen.

Grab a spoon and dive in!
banana and date icecream 4
Sorry about horrific pictures! Oh and the chipped dish oops!

Friday, 2 December 2011

Christmas made easy with Knorr and Marco Pierre White

Christmas can be one of many things, from a relaxed affair with perhaps a glass or two of your favourite bubbly, to a frenzied mad rush! Following on from my recent post about cooking with Knorr, here are some exclusive tips I've hand picked for you from Marco Pierre White on how to make your Christmas cooking more enjoyable this year, along with my notes!

Shopping list
Organisation is the key to a stress-free Christmas. If you want to enjoy a bird or a large joint, make sure you order it in advance; don’t, whatever you do, leave it until the last minute. (been there, done that, have the turkey crown to feed an army t-shirt!)

Make a list of what you need to buy and be sure you get the shopping done in plenty of time. This is the time of year when supermarkets will run out of ingredients like brussel sprouts, fresh cranberries, chestnuts and double cream, so thinking ahead will really pay off. (I started my planning in early November and have already made my stuffing, Christmas pastries and par-boiled my sprouts!)

Kitchen kit
Being organised also pays off when it comes to the kitchen. Check you have a roasting tin large enough for your turkey or goose; this is the same for serving dishes and the cheese board. Don’t forget to stock up with plenty of kitchen foil and cling film. (This year I am cooking in my brother’s kitchen I.e. a small cupboard. I have invested in disposable foil dishes for ease!)

Christmas canapés
Get the meal off to a great start by serving a glass of fizz with a pre-dinner nibble. Smoked Salmon Pate and Stilton Pate are perfect this time of year and can be made in advance; serve them on crackers, mini oatcakes or home-made crostini. (I have been experimenting with Stilton – check out my next post for the results!)

Bread sauce
Home-made bread sauce really is the best; try Marco’s recipe and see for yourself. The trick to making bread sauce is the 3:1 ratio; three times the amount of milk to breadcrumbs. Simple to remember and you can make as much as you like.(I am going to try this one out this year, Christmas wouldn’t be the same without bread sauce!)

Above all, try to relax! Christmas should be enjoyable for everyone – delegate tasks to ease the burden and don’t try to over complicate your meal.


This year see's a big change for me as I have previously spent Christmases with my ex-partners family, being cooked for, but this year me and my brother are sharing the cooking - its going to prove interesting! My brother is very laid back, whereas I prefer military precision in planning...! 

We are also going for a slightly alternative Christmas dinner too, on the big day we are actually having a full mixed grill, however on Boxing day is going to be the full kit-n-kaboodle with the turkey and all the trimmings! I love turkey but didn't wanted to do two days exactly the same, also fitting things around work shifts means in theory this should all work perfectly...! What is everyone else planning this year?

With my Forman and Field/ Knorr goodies I have been working on some great Christmas recipes, which will coming up on the blog soon!


Winner of my Hotel Chocolat Giveaway..

Well the wait is over...and after a staggering 162 entries to sift through, and the help of random.org number generator I am very pleased to announce that the winner of my Christmas Hotel Chocolat Giveaway is...lucky number 157 - 'Kev'

Kev - congratulations, I have dropped you an email!

Many thanks for all your entries!


Wednesday, 30 November 2011

Amaretti Kisses with Hot Chocolate Cherry Sauce

Okay I will be honest the kisses whilst delicious, didn't quite look as presentable as I’d planned in my head or notebook. Yes I do agree they look *slightly* like chicken goujons. Though fortunately do not taste anything like them! However the sauce is ohmigod unbelievably simple but omigod soo soo good! It will change your life.

The Hot Chocolate Cherry sauce is most definitely the best dessert sauce I have ever made. A thing of greatness. Post filming of this recipe saw both me and my brother, and also excellent cameraman very un-elegantly devour the remaining sauce, along with making a second batch of the kisses mixture for dipping into. This is also why I didn't manage to take a picture of the finished dish as greed took over!


Its got a real ‘naughty treat’ feeling! Its also ready in less than ten minutes, which is either very dangerous or very good? I can imagine it being rather lush served over vanilla icecream. Or just secretly with a spoon when you are alone.

As most of you will know I am a complete chocoholic and whilst I can be fussy when it comes to choosing, I am not fussy on price and will pay for what I like. For this recipe its best not to crack out your finest stuff bought for best – I used Sainsburys basics dark chocolate, which was surprisingly edible and for a meagre 30p per bar was absolutely perfect for the sauce. 

This recipe is also the final in my video’s for Russell Hobbs, you can vote for this recipe on this link! Many thanks to all who voted so far and I hope they didn’t put you off visiting my blog! You can check out my other three here and there is still time to vote if you like them - all you have to do is click on the 'like' bit underneath the video:


I would like to give a special thanks to the lovely Agata at Manning Gottlieb OMD who has been a great help at times during the last four challenging weeks! Also a big thanks to Russell Hobbs for inviting me to take part and getting to play with lots of your lovely shiny kitchen stuff!

This weeks theme was 'freestyle' and I chose to play with the 3-in-1 Hand blender. Its a great piece of multi-tasking kit, and my favourite out of all the Allure range. As well as making this recipe, I've also used it for lots of other kitchen jobs and have been very pleased with its performace. If you have a small kitchen and are considering a multi-tasking tool then I would highly recommend this, as it will cover most of your mixing, chopping and blending jobs, with ease. 

Recipe:

Serves 2
Easy
Under 10 minutes 

Sauce:
½ Tin pitted black cherries in juice
25g Dark chocolate, broken up
1 tbsp Disaronno liqueur (amaretto)

Amaretti Kisses:
100g Ricotta
50g Double cream
20g Icing sugar
8 Amaretti biscuits (Doria brand are ideal)

Firstly, drain the cherries reserving the juice. Place 75g of cherries in a bowl, and 100ml of the juice in a small pan, place on a medium heat

Meanwhile blitz the amaretti in the Allure chopper attachment to thick crumbs and lay on a plate. Add the drained cherries to the chopper attachment and blitz to a thick mixture, stir into the bubbling cherry juice.

Put the double cream in the Allure beaker, whisk briefly using the whisk attachment until just thickened, add the ricotta and icing sugar, and whisk briefly until creamy and thick, being careful not to get into butter territory! Use two dessert spoons to very carefully shape into quenelles, roll carefully in the crumbs and place on your serving dish

Stir the disaronno into the bubbling cherry mixture and cook for a further two minutes. Remove from the heat and stir in the chocolate. Allow to melt then serve in little bowls, alongside the Amaretti kisses.

Enjoy!

You can see my video also via Youtube:


Sorry again about awful picture - as mentioned above, greed took its hold and so this is taken from the video!


Monday, 28 November 2011

Christmas Swirls

Is it too early to mention the C word yet? No? Okay phew! Aveen - I know you have been waiting patiently for these!

This year I am trying to be organised and have already started squirrelling things away in the freezer for Christmas meals. As someone who does shift work, and will be working throughout the festive season getting ahead now will hopefully mean calm in the future, and more importantly less washing up on the big day itself! As well as a batch of these lovely little swirls, ready for Christmas snacking, I’ve already made up a batch of carrot and swede mash, and two batches of pork, cranberry and apple stuffing mixes!

The inspiration for these lovely, festive little swirls came from having a spare block of puff pastry that needed using up, and a recipe from the latest Tesco instore magazine (please tell me I am not the only magpie who picks up every freebie recipe card/ magazine/ newspaper?) Plus I’ve also always wanted to make Danish pastries and finally seized my chance on a treasured day off this week!

I adapted the original recipe to what I had in the various boxes I moved house with and adjusted quantities as to what felt right! These little puffs are rather good and are great with a nice cup of coffee or tea! They are easy and fun to make and will be very popular, judging by how quickly mine vanished!

Makes 30 swirls - Keep half, freeze half. Or all. Depends if you can wait till Christmas!

Ingredients

500g block puff pastry
plain flour and icing sugar for dusting
200g good quality mincemeat – I used Sainsburys Taste the Difference
2 tsp runny honey
1 tsp orange extract (I love Sainsburys TTD Valencian orange extract)
50g + 10g flaked almonds, roughly crushed in your hand
40g + 20g dried and sweetened sour cherries, roughly chopped
Small chunk of Angelica, sliced into little bits

Method:

In a bowl mix together the mincemeat, orange extract, honey, 50g of the almonds and 40g of the cherries. Christmas Swirls 11
Cut the pastry block in half, roll one block out on a floured surface into a rectangle shape, about 1/4cm thick or so. I laid mine at this stage onto cling film – makes the next stages easier! Spread over half the mincemeat mixture in a thin layer, right to the edges.
Christmas Swirls 13
Now use the cling wrap to help roll it really tightly, like a swiss roll, wrap tightly in flim and freeze for 15 minutes
Christmas Swirls 14

For the second batch, assuming you are going to freeze them, repeat the above stage

Pre-heat oven to 200 fan

Line a baking tray(s) with baking/ parchment paper

Carefully remove your rolls from the freezer. Using a sharp knife cut the first roll into 1cm strips and lay flat on the baking tray, leaving space for them to expand a little. Press over the little bits of angelicaChristmas Swirls 18

Bake for 15 minutes or until golden and your kitchen smells a little like heaven. Whilst still hot, sprinkle with remaining almonds and cherries and dust with icing sugar. Allow to cool on the paper, then transfer to a wire rack. They will be a little sticky underneath so just nudge now and again to loosen.

With the remaining roll, also cut into 1cm rounds but transfer onto baking / parchment paper, in small layers and transfer to a suitable container for freezing. Freeze until Santa is on his way.

*Note the 10/g20g almond/ cherry mix is only for 15 freshly baked swirls You will need more for when the frozen friends come out to play*
Christmas Swirls 4

I've sent my Christmas Swirls over to Sweets for a Saturday #45- a fabulous blog full of naughty but nice treats! 


Saturday, 26 November 2011

Cooking with Knorr..

Over the next year I will be working with Knorr to bring you a selection of seasonal recipes. It’s an exciting project and I hope to bring you some fantastic ideas and recipes!

On a personal note, since the launch of the Knorr stock pots I’ve been using them frequently and find they give an excellent base to stews, sauces etc. I really like how quickly they dissolve, and another bonus is that I don’t have to crumble up a stock cube – a pet hate of mine! Most importantly they taste natural, not over salty and produce excellent results every time.

Over the last decade or so Britain has really caught up with our European counterparts in the food stakes, and I am very proud of the excellent quality of products that are now available. So when Knorr approached me and asked if I would like to cook with some produce from Forman and Fields, I naturally jumped at the opportunity! They are quintessentially British and source the highest quality products for your table.

Recently I took delivery of a rather fabulous seasonal hamper from Forman and Fields, and with the contents of it I have been playing with my food, something our mothers most likely criticised us for doing when we were young! I probably should have been busy revising but cooking is far more fun to do than Maths!

Within my hamper I was given everything to make the ultimate Christmas Dinner. However factor in shifts, attending college and in general being fairly occupied, I was not able to produce said dinner in one go and some bits have been squirreled away into the freezer (including a gigantic turkey that my poor brother had to cycle home with in his rucksack – I so would love a picture of this!). However, I have instead been busy making stuff with all the lovely ingredients! 

These are a little teaser of what will appear on the blog shortly!


Tuesday, 22 November 2011

Spiced Cauliflower soup with Chickpea Raita Topping

This lovely, gloriously green soup is packed with fresh herbs and flavour, and its also my third Video recipe in the Russell Hobbs Blogger VS Fans challenge that’s currently in progress over on Facebook!


This week I got to play with their Allure Jug Blender and I must say I am seriously impressed with this new shiny toy! I’ve used a couple of different blenders over the past few years, ranging in quality but this is a mighty beast! The key features for me are the pull out cord (which admittedly my brother discovered after the first use!) and the speed settings which are easy to control; always important for someone who doesn’t like to read instruction manuals! Another bonus is its little rubber feet that stop it dancing on the counter! Its a big machine, but its still pretty and shiny!DSC00818

Whilst the soup has a range of herbs and spices in, its not actually hot as in spicy heat. Regrettably I can’t tolerate much chilli nowadays and this is pleasantly mild but flavourful. If you would prefer a little heat, add a green chilli or two to the mix. The blender does a great job at making it really smooth, so no nasty gravelly bits which I’ve had in the past with other liquidizers!

Serves 6, Easy, Ready in under 30 minutes

Ingredients:

1/2 a large or 1 regular sized cauliflower, cut into smallish chunks
1 white onion, finely chopped
1 medium sized potato, diced
1 bunch fresh coriander, roughly chopped
1 tsp cumin seeds
1tsp freshly ground coriander seeds
1 tsp turmeric
1 tsp black mustard seeds
40g cooked chickpeas
1500ml vegetable stock
Spray cooking oil or olive oil
S&P to taste

Topping:

40g cooked chickpeas
Pinch of garam masala

Raita:

120g plain natural yoghurt
1 small bunch fresh mint, roughly chopped

soup image

Start by sweating the onion in a large saucepan in spray oil, until soft but not too browned. Stir in the ground coriander, mustard seeds, turmeric and cumin, and potatoes, stir well, add the cauliflower, cover with the stock and bring to the boil, reduce the heat and gently simmer for 15 minutes, stir in the chickpeas for final minute to warm through.

Meanwhile stir the mint into the yoghurt. In a small pan, add a teeny bit of oil, toast the chickpeas for a couple of minutes with the garam masala. Reserve to one side

Blitz the soup in the blender, until all lovely and smooth. You will need to do this in two batches – have a clean saucepan ready for transferring the soup back into, to keep warm. Season the soup, and ladle into bowls. Swirl in a little of the yoghurt and sprinkle over a couple of the chickpeas and a sprig of fresh coriander to garnish and serve. Some little naan’s would be lovely on the side but I forgot to buy any so had granary toast, which works equally well!

The soup will keep up to four days in the fridge and re-heats very well. In fact it reminded me I must buy a new portable soup container after accidentally melting mine at work the other week…

You can also watch me cook this recipe on Youtube:


Enjoy!

Wednesday, 16 November 2011

Apple Streusel Cake

This is a new cake for me, as I’ve never made, or remember eating a ‘streusel’ topping before! I recently picked up a packet of bramley apples for my Christmas stuffing and had two spare...There was lots of debates between myself over what to make with the remainder and then I spotted this cake in one of my friend’s book ‘Grandmas Favourite Recipes’ and with a morning spare (well, sort of, have never been good at prioritising!) I decided to have a bash at making it!

Whilst there are a couple of separate stages to the recipe (hello three mixing bowls!) its easy to follow and make. Its also a very nice cake to sit down and have a cup of tea with in the afternoon. I did eat mine cold, though I think it would be very good served warm as pudding, perhaps with a nice scoop of vanilla icecream! One thing that did surprise me is that the cake wasn’t overly sweet but completely in a good way, the girls at worked loved it and I hope you will too!
DSC00863

Whilst the streusel topping does make it a little more challenging to slice up, it did give the cake a nice edge and I found myself picking at the all the remnants in the in after cutting! I do love chef’s perks!

You will need a 23cm springform cake tin, lined

Serves 8-10

Ingredients:

115g butter (plus extra if greasing your tin - I am lazy and always use liners!)
450 cooking apples
175g self raising flour
1 tsp ground cinnamon
pinch of salt
115g caster sugar
2 eggs
2 tbsp milk
icing sugar to dust (forgot this bit!)

Topping ingredients:
115g self raising flour
85g butter
85g caster sugar

Method:

Firstly make the topping by sifting the flour into a bowl, rub together with the butter to form coarse breadcrumbs I.e. small lumps. Stir in the sugar

Pre-heat oven to 160fan/ 180/ gas 4

Peel, core and thinly slice the apples and reserve (I did this stage last)

Sift the flour, cinnamon and salt together. Separately beat the butter and sugar until light and fluffy, gradually beat in the eggs, adding some of the flour each time. Gently fold in remaining flour and milk.

Spoon the batter into your prepared tin, top with the apple slices and sprinkle over the topping. Bake for about an hour – due to the topping I found judging it hard so gave it an extra ten minutes! The topping should be firm and golden. Leave to cool down in the tin before opening the sides up.

Dust with icing sugar before serving. (I forgot this bit!)

DSC00868I'm also sending this one over to Bookmarked Recipes number#6!

Monday, 14 November 2011

Banana Meringue Pie

These simple tarts have a sweet banana and almond filling, with a crispy yet marshmallow-y meringue topping . The inspiration for the recipe came from an old Good Housekeeping recipe for pineapple meringue pie. However I have a fond dislike of pineapples (its the texture!), plus at the time of dreaming up recipe I had a surplus of bananas (remind me to look next time on the market how many there in those £1 bowls!) and with a little tweaking came up with this recipe!

Banana meringue 2

The tarts are also are my second video recipe for the Russell Hobbs Blogger vs Fans challenge! This week I got to play with the Allure hand mixer, which is really good. I’ve never had a ‘handheld’ mixer before so its rather nice to finally own one, even better in that its an excellent, well designed product. The main thing I love is the little LCD panel which tells me what speed I am at, and how long its been on for! If you like my recipe, please pretty please come over to Facebook and click on the ‘like’ underneath my video!


Being filmed cooking is one of the hardest challenges I have done! I am not naturally organised and when I cook it normally involves finding random ingredients and the hope it will produce something edible. Also me and meringue are not best of friends, being a relative novice but if I can manage it, I am quite sure it will be a breeze for you!

There are a few scenes not shown on the video – I never normally have a problem with eggs breaking but these were evil – I broke three and had to wash up the bowls halfway through! It did remind me of a less than fun time when I was in a supermarket buying eggs – I was carefully checking that none of them were cracked etc, picked one up and it broke in my hand! Truly nasty and I had to rather embarrassingly ask for some paper towels, I couldn’t wait to get home and wash my hands!

Somehow though it all came together, and the recipe whilst is unusual, it actually tastes really good! I originally thought these would serve 2 but the tarts were actually quite big so probably best to share between 4 of you!

Serves 2-4

Ingredients

2 x 10x10 dessert pastry squares
Egg spray or 1 small beaten egg
1 large whole egg, separated
2 bananas
1 tbsp cornflour
2 tbsp water
1 tbsp ground almonds

Spray the pastry squares with egg wash or beaten egg, score a line about 1cm in from the edge and make a few shallow knife dents, bake for 6 minutes at 180 fan/ 200, allow to cool slightly

Heat a small pan. Blend the cornflour and water, add to pan and bring to boil, when its started to thicken – it won’t take very long – stir in the mashed banana and almonds, beat for a minute and add the egg yolk, stir over a moderate heat for a further minute and then turn off the heat – it should be thick and creamy

Whisk the egg white in a clean bowl for no less than 5 minutes, slowly adding the sugar after it has started to whiten, beat in until the meringue is all glossy and white,holding a soft peak. Carefully spoon into a piping bag with a large star nozzle

Place the banana mixture in the centre of the tarts, pipe over the meringue and bake for 16 minutes or until crisp and cooked through. Reduce the heat if browning too much. Transfer to a cooling rack to cool down completely.

Best eaten on day of making. It still tastes great the next day but visually not so good...!

Banana meringue 6
01 09 10